X
wikiHow is a “wiki,” similar to Wikipedia, which means that many of our articles are co-written by multiple authors. To create this article, 9 people, some anonymous, worked to edit and improve it over time.
This article has been viewed 48,213 times.
Learn more...
Here's a felt ice cream purse that looks as tasty as the real thing! This cute little purse requires only basic sewing skills and some quality felt.
Steps
Method 1
Method 1 of 2:Preparing the Felt
Method 1
-
1Cut the felt pieces. Size the purse to hold your desired items; one suggested measurement is about 22cm/8.6" high x 14cm/5/5" width, but feel free to adjust as preferred. Use the guidelines in the image to help you create your templates:
- Two dark brown felt pieces for the background of the ice cream
- One light brown/beige felt piece for the cone of the ice cream
- Two fluffy white felt pieces for the ice cream
- Two round red felt pieces for the cherry.
Advertisement

Method 2
Method 2 of 2:Assembling the Ice Cream Shape
Method 2
-
1Tack or pin the two white ice cream felt pieces to one of the dark brown ice cream felt pieces. Place the white pieces one on top of the other and tack onto the back piece.
-
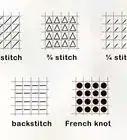
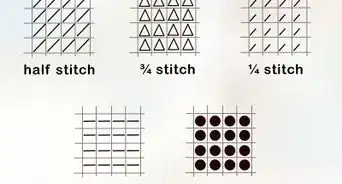
2Draw criss-cross lines onto the beige cone felt piece. Use a fabric marker or tailor's chalk, with a ruler to ensure neatness. See the image above for guidance.
-
3Tack the beige cone shape to the same dark brown felt ice cream piece. It tucks underneath the white ice cream felt pieces (see image above). Then tack the two circles in place, one on top of the other, at the top of the white ice cream pieces.
-
4Join the two dark brown ice cream pieces together. Pin or tack the zipper between one side of the first dark brown felt piece and then attach to the other side, as shown in the images above and below.
-
5Sew the ice cream bag pieces. This is where the ice cream bag is properly stitched together:
- Stitch the zipper to the felt pieces. Use small stitches in the same color as the felt piece to attach the zipper firmly. Remove the pins or tack lines.
- Stitch the white ice cream felt properly and remove the tack lines (or pins).
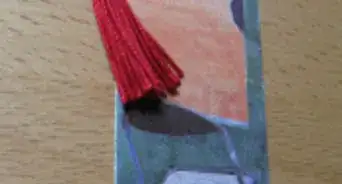
- Stitch the red cherry circles properly and remove tack lines (or pins).
-
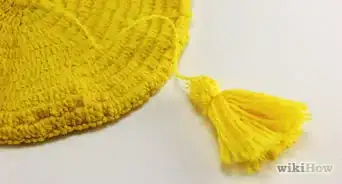
6Decorate the ice cream. These finishing touches help to make the ice cream look more realistic.
- Stitch along the criss-cross lines to attach the beige cone piece. Use a darker thread, preferably one the same color as the dark brown backing thread, to help the stitching stand out. Remove the tack lines.
- Sew colored tiny buttons and pipe beads onto the white ice cream felt, to suggest sprinkles on the ice cream. Add randomly, in any pattern you like.
-
7Sew the bag together. Stitch both of the felt pieces together, to complete the bag. Make adjustments as you sew and remove all loose threads when finished.
-
8Done.Advertisement


Community Q&A
-
QuestionWhat if I don't have a zipper?
 Community AnswerYou can always find a different manner to fasten the purse, such as buttons.
Things You'll Need
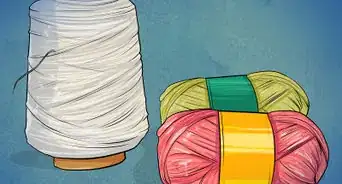
- Felt – dark brown for the ice cream purse pieces; beige/light brown for the cone; white for the ice cream; red for the cherry
- Fabric scissors
- Sewing threads in matching or complementary colors
- Needle
- Fabric marking pen or tailor's chalk
- Zipper
- Buttons
- Small pipe beads (lightweight)

About This Article
Advertisement