X
This article was co-authored by Lois Wade. Lois Wade has 45 years of experience in crafts including sewing, crochet, needlepoint, cross-stitch, drawing, and paper crafts. She has been contributing to craft articles on wikiHow since 2007.
This article has been viewed 26,195 times.
Is your current wallet in tatters or too small to hold all your "loyalty cards"? Would you like to customize your wallet? Or perhaps you would simply like to have money to put into a wallet after you've purchased one? Sewing your own wallet can give you all of the above! Here are the easy steps to do so.
Steps
-
1Obtain the items listed in the "Things You'll Need" section below. Launder all fabrics and press them smooth.
-
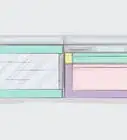
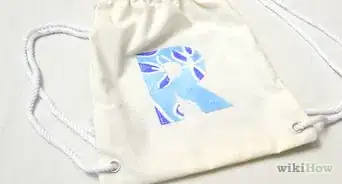
2A checkbook type wallet needs a cover that is a square 8 inches (20cm) on a side. Cut the outer fabric to this size. You may add a bit of width to this measurement to give yourself some leeway while sewing, but be prepared to cut off the extra before you add the bias tape to finish the edges.
-
3Cut a 9 x 20 inch (22.8cm x 50.8cm) fabric swatch for the credit card pockets and take it to your ironing board with some pins and a ruler or measuring tape.
- Note: this can be 8 x 20, but it doesn't hurt to have a bit extra width to help match fabric pattern, etc. See the sketch.
-
4Iron a crease every 4 inches (10cm).
-
5Iron five 2 inch (5cm) by 8 inch (20cm) wide strips of interfacing to the back side of the fabric, lined up with each pleat.
-
6Top stitch the pleats and then align them in a stair step fashion (approx 1/4 inch / 6.35mm apart). Iron again to crease the pocket bottoms into place.
-
7Stitch a line up the center of your pocket pleats if you are going to have two columns of cards side by side. (This is recommended for this size wallet).
-
8Create a zipper pocket for your coins. Cut two strips of fabric 9 inches (22.8cm) long (the width of the wallet) and at least 6 inches (15cm) tall.
-
9Line up one edge of the zipper along the top edge of your CC pockets. Pin.
-
10Position the contrast fabric and the top of the CC pouch fabric with their 9 inch (22.8cm) edges along the zipper and sew them to each side of the zipper starting at the opening end (not the closed end of the zipper). An easy way to do this is to purchase a 9 inch (22.8cm) zipper to begin with, but you may also shorten a longer zipper if you need to.
-
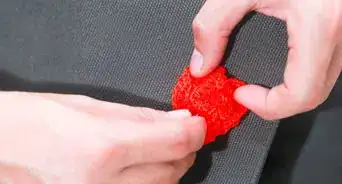
11Fold the fabric away from the zipper teeth and top stitch the fabric so that it does not "catch" in the zipper teeth later.
-
12Top stitch.
-
13Repeat for both sides. You may sew a second piece of fabric to the reverse side of the zipper at the same time if you wish to make a lined coin pocket. (Nice? But not necessary.)
-
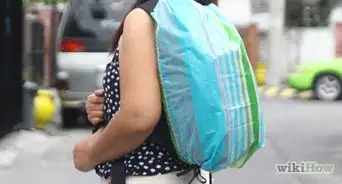
14Close the zipper and flatten the fabric. Fold the fabric over so that the zipper is positioned along the top front edge. Pin the sides and baste them together.
-
15Trim any extra length at the bottom of the coin pocket at this point. Don't worry about basting it. This will be fastened closed in the final step.
-
16Lay the credit card pocket with its zipper over the outer/inner layer sandwich. Line up the edges so that the zipper is in the center, along the fold line. Pin.
-
17Create a pocket for the other side. Cut a 9 x 8 inch (22.8cm x 20cm) piece of fabric. Iron interfacing to the back of it. Fold in half. Baste the short edges. Top stitch the long folded edge.
-
18Place the wallet exterior and liner back to back and line up the edges. Pin.
-
19Place the coin pocket/CC pockets with zippered edge to the center and raw edges to the outside edge. Pin.
-
20Place the pocket along the opposite edge, with raw edges to the outside and the finished edge along the center folding line of the wallet.
-
21Pin and then machine baste all layers together. Trim any threads or uneven edges.
-
22Pin the bias tape to the edges.
-
23Top stitch the bias tape into place, taking care to catch all layers in the stitching. Double stitch for security if you feel it necessary.
-
24Trim all loose threads. Enjoy your wallet!


Things You'll Need
- Approximately 1/4 yard (22.86cm) each of the following fabrics: Heavy denim or twill for the exterior and two contrasting fabrics for your lining
- 1/4 yard (22.86cm) iron-on interfacing
- Bias tape
- Sewing machine (optional? But this will be much easier to do on a machine)
- Sewing scissors
- Measuring tape and possibly a square edge
- Matching thread
- A few credit cards (for measuring purposes)


About This Article

Lois Wade
wikiHow Crafts Expert
This article was co-authored by Lois Wade. Lois Wade has 45 years of experience in crafts including sewing, crochet, needlepoint, cross-stitch, drawing, and paper crafts. She has been contributing to craft articles on wikiHow since 2007. This article has been viewed 26,195 times.
Co-authors: 8
Updated: April 4, 2021
Views: 26,195
Categories: Featured Articles | Bag and Purse Projects