X
wikiHow is a “wiki,” similar to Wikipedia, which means that many of our articles are co-written by multiple authors. To create this article, 20 people, some anonymous, worked to edit and improve it over time.
This article has been viewed 52,473 times.
Learn more...
Have you been inspired by the popular Broadway musical "Cats?" Or just love our feline friends so much you want to dress up like one for Halloween? Here are step-by-step instructions to show you how to put together a full cat costume inspired by the look from the musical.
Steps
Method 1
Method 1 of 4:Tail
Method 1
-
1Select the materials for your tail. Begin by using either rope or cording that extends past the back of the knees when held up to your waist. Make sure at least a three- to four-inch portion of the rope or cording is reserved. This will be used to make the loop for the belt.
-
2Mark a line where you want your loop to be. Once this has been completed, you can start making the actual tail.Advertisement
-
3Wrap a 5 feet (1.66 meter) piece of 16 - 20 gauge annealed wire around a rod or stick tightly securing one end to the stick and pulling from the other end. Using your wrists tightly and firmly twist and turn the stick pulling and wrapping the wire to the stick.
- Create just enough tension to keep the wire straight and neatly wrapped around the stick to turn the wire into a spring.
-
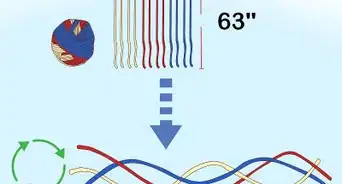
4Once the entire wire is neatly wrapped around the stick, slowly pull and stretch the wire evenly spaced to the desired length of the tail.
- Insert the piece of rope through the center of the wire spring. This will make your tail stay erect and flexible.
-
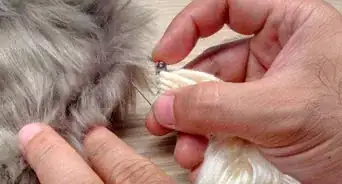
5Decorate your tail with yarn.
- Purchase yarn in whatever colors you like. For the best effect, the colors should match your costume.
- Cut a six-inch strip of yarn, and then cut that strip in half.
- Take both strips, and starting about an inch or so from the bottom, tie both strips onto the rope or cording (they should be right next to each other on the rope or cording).
- Repeat these steps, but twirl the rope around as you go to ensure the yarn is distributed evenly all the way around the rope or cording. You will inevitably notice gaps in your tail.
- Cut some more lengths of yarn. For these, do not tie the yarn around the rope or cording. Instead, knot the two halves of the strips of yarn and super glue them where you see gaps.
-
6Make the belt loop. Fold over the length of rope or cording that you had marked off, and either tape, superglue, or tie it tightly with yarn to make a loop. Make sure it's secure and won't come undone.
-
7Cut a round piece of leather, plastic, cardboard, or wood slightly bigger than the diameter of your tail. This will be used as the base connection of the tail to your belt.
- Drill or punch a hole wide enough to fit the end of the tail's wire through the center of your tail base. Wrap and secure the 6 inch wire end to the belt and round base.
- Cut a strip of rubber cabinet liner or plastic tape around the base and the wire to cover any sharp edge of wire and add extra strength to hold the tail securely.
-
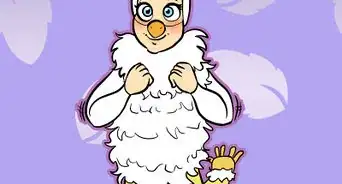
8Add a furry look, if desired. Cutting and gluing or stitching strips of soft and fluffy fabric around the diameter and length of the tail can make the tail look like real cat fur.Advertisement


Method 2
Method 2 of 4:Wig
Method 2
-
1Use a white swimming cap as the base of your wig. Mark places where you want the parts of the wig to go--the ears, different colors of fur, etc. Draw lines separating portions of the cap as you go.
-
2Divide and mark the places on the swimming cap where you want to place your yarn, synthetic fur, or wool (these can be in any color).
-
3Glue or sew your pieces of fur onto the swimming cap in your marked areas.
- If you use yarn, you must fray it with a fine-bristled cat grooming brush after repeating the first step of making the tail (knot the halves of pieces of yarn together, then fray)
-
4Prepare the ears. Twist together longer pieces of your fur material at the top. Securing the topknots with thread or little hair ties, or cover the entire tips of the ears with yarn that matches the wig. This prevents the topknots from coming undone.
-
5Glue the fur or yarn onto circular pieces of cloth. Once the ears are made, glue them onto the cap and ensure they are secure and not floppy. Once this is done, you may use hairspray or styling gel to style it however you want.
-
6Prepare the sideburns. They should consist of strips of cloth or whatever you think will work. Shape them like an isosceles triangle. Sew the sideburns onto the wig.
-
7Sew or glue your fur onto your sideburns. This all should be done on a porcelain/foam/plastic head to ensure precision and accurate measurements.Advertisement


Method 3
Method 3 of 4:Costume
Method 3
-
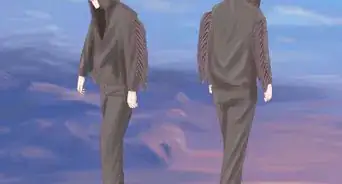
1Use a unitard or a leotard as the base of the costume. If you plan on painting it, make sure to use a white one.
-
2Draw up a design of what color of fabric paints you want to use and where on the costume you want them to go. A sketch (whether on paper or a computer) will always help you plan.
-
3Begin painting the unitard. Stuff it with plastic bags or place it over a mannequin to ensure accuracy.
- There are many different styles of painting to use when making a cat costume, but if you don't have the time or just want to get it done and over with, paint the base color with big, bold strokes, allowing the color of the unitard to show slightly underneath depending on what colors and designs you will use.
- Use only fabric paint.
-
4Once you have your base color(s), layer it according to the colors of the character you are using or want to be. If you want to be a specific character, look up pictures of him or her to get the color idea, then incorporate their design onto your sketch design.
-
5Follow the instructions for the paint you used as to how you should wash it and let it dry.
-
6Add the shoulder pads to your costume. This is important if you're going for the musical-inspired Cats look. Use frayed yarn, fur, or feathers. Attach them (sew them if you used yarn or glue them if you used fake fur and feathers) to the shoulders of your costume. As always, be sure to match the design of your costume.
-
7Apply your makeup. Use your character's makeup or your own design.
-
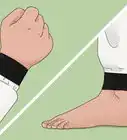
8Wear arm and leg warmers. Buy, crochet, or knit your own based on the character's colors and designs. Paint gloves to match the costume.Advertisement


Method 4
Method 4 of 4:Lips and Whiskers
Method 4
-
1Find band-aids from a first aid kit big enough to cover the top of the wearers lips up to the nose. Remove the top of the band-aids exposing the top tan colored tape.
-
2Use scissors to cut thin hair like strips of clear plastic from a soda bottle. These will be the whiskers for the face.
-
3
-
4Spray paint the lips to a desired color or wait to add makeup once it's time to dress-up.
-
5Leave the non-stick tape covering the adhesive band-aid on the back until it is time to wear the costume.Advertisement


Community Q&A
-
QuestionIf I don't have rope, could I use a scarf?
 Community AnswerYes.

About This Article
Advertisement