X
wikiHow is a “wiki,” similar to Wikipedia, which means that many of our articles are co-written by multiple authors. To create this article, 9 people, some anonymous, worked to edit and improve it over time.
This article has been viewed 6,970 times.
Learn more...
A cat closet is a small hideaway for your cat. The one suggested here is cat-shaped, just so it's clear whose cozy spot it is. Keeping it as simple as possible is the goal, and if a child is making it, you'll need to do all the sawing and help with the precise gluing, but the child can have a lot of fun decorating it and adding the soft furnishings for puss to enjoy.
Steps
Part 1
Part 1 of 4:Preparing the wood
Part 1
-
1Purchase four pieces of thick wood. Either have the pieces cut into the same-sized squares at the hardware store or be able to do this at home. (The squares should be large enough to form a little closet enclosure for the cat; take along measurements.)
-
2Purchase a piece of plyboard or other thin, strong board. It should be as high as one of the squares. This will form the cat shape.


Part 2
Part 2 of 4:Preparing the cat shape
Part 2
-
1Draw a cat shape on a paper template. The shape you choose must involve a lot of space under the cat or somewhere around the cat, that serves as a hole for the real cat to enter under. Some ideas for the shape include a cat sitting upright with space to the side, a cat stretching up high with space to the side or a cat arching its back, with plenty of space under the cat's stomach (centered). The hole area must be large enough for your cat to walk under or alongside.
- If it's hard for you to draw a shape, look online for suitable cat shapes and print some off to trace around or copy.
-
2Cut out the template. Next, hold the cur-out template against the wood piece and trace around it. This will provide the guidelines for sawing out the cat shape.
-
3Use a craft saw such as a jigsaw to cut out the cat shape on the wood piece. Sand down the edges if needed.
-
4Paint the cat. Paint it any color you like, adding features such as patches, paws, whiskers and eyes, etc. Allow to fully dry before proceeding.


Part 3
Part 3 of 4:Putting the cat closet together
Part 3
-
1Hot glue three pieces of wood together to form three sides of the "box" that will form the closet.
-
2Glue the cut-out cat piece to the fourth piece of wood. Allow to dry in place fully.
-
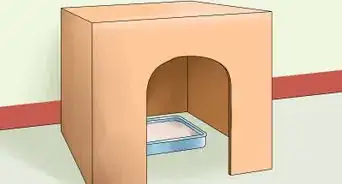
3Using the saw, cut out an entry hole where you've left the hole under or alongside the cat shape in the other piece of wood. This now allows the cat entry to and exit from the closet.
-
4Glue this last piece to the remaining three pieces to finish the cat closet. Allow to dry completely. Check that it is firmly held together by pushing on the whole structure gently; make any adjustments needed.


Part 4
Part 4 of 4:Finishing off the cat closet
Part 4
-
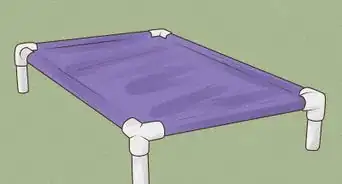
1If wished, you can add a "roof". This can be made from net fabric, plain fabric or similar. However, it can be good to leave it uncovered, to allow you to peek on the cat as it sleeps inside the closet.
- Temporary objects can be placed on top to provide the cat with more privacy, such as a newspaper, an oversized book, a piece of thick card, etc.
-
2Decorate the outside. Paint the sides of the cat closet or add patterns, stickers, etc.
-
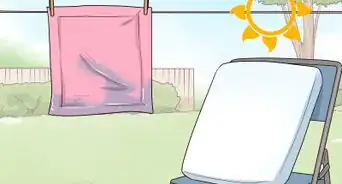
3Put some blankets and pillows inside to make it comfortable. An old sweater wrapped about a cushion that is the exact size of the closet shape is ideal.
- If you need to make a cushion to fit the dimensions, this can be done simply. Measure the inner square, and cut two pieces of fabric to this size. Sew together three sides and fill with stuffing. Then sew up the final side. That's all there is to it! And as puss doesn't care how neat it is, it's a great first sewing project for an older child.
-
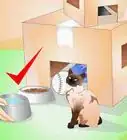
4Now you and your cat can enjoy your handcrafted DIY cat closet.
- Entice your cat inside by placing a catnip mouse in there. Your cat will soon get the message!


Warnings
- This project is not for young children.Thanks!
- Choose non-toxic products to decorate the cat closet with; do not glue on anything that the cat could pull off and potentially swallow.Thanks!
- If children are building this, supervise any usage of the saw. Children with no experience of using a saw or who are too young should not saw out the pieces.Thanks!
Things You'll Need
- Thick wood for the sides of the closet
- Thinner wood for the cat shape
- A craft saw
- Paint and other decorative items for the outside of the closet
- Hot glue gun (glue must be suitable for wood, and strong)