X
wikiHow is a “wiki,” similar to Wikipedia, which means that many of our articles are co-written by multiple authors. To create this article, 9 people, some anonymous, worked to edit and improve it over time.
This article has been viewed 12,560 times.
Learn more...
Want to dress up your cat? Give him a little pep to his appearance? This article will tell you vaguely how to do it.
Steps


Part 1
Part 1 of 2:Making the Bow Tie
Part 1
-
1Take your two pieces that are 2.5 X 3.5. If you have altered the size, you will want to use the pieces that are the same size.
-
2Pin the right sides of the material together and sew using a 1/4 inch seam allowance. Be sure to leave an opening about 2 inches (5 cm) wide on one of the long edges.
- Be sure to backstitch the beginning and end of your work. This will ensure that it doesn't come loose.
-
3Trim the corners and the edges. At the edges, be sure to cut at an angle so that when inverted, the material won't bunch.
-
4Using the opening that you left before, invert your bow.
-
5Fold in the edges at the opening so that it looks like the seam you already created.
-
6Iron and then sew the edges, with an 1/8 inch seam allowance.
-
7Fold both of the pieces (the long way) and pin them.
-
8Sew the long edge with a 1/8 inch seam allowance. Not the ends, just the long edge.
-
9Using the safety pin, invert the two pieces.
-
10Once you have the pieces inverted, iron them so that they are flat.
- At this point, you should have a rectangle with a seam allowance and two strips for the bow.
-
11Hold the bow in the center and 'scrunch' it so that it resembles the bow that you are creating.
-
12Take the shorter of the two strips and wrap it around the bow.
- Adjust its snugness so that it has the desired shape that you want for your bow. Once you know how long that you want it to be, cut off the unneeded length of the strip.
-
13Sew the ends of the strip together with the seam facing out with a 1/8 inch seam allowance. Next, invert the tube that you have just created and put around the bow.


Part 2
Part 2 of 2:Making Your Cat's Collar
Part 2
-
1Take the leftover strip that you have left from making the bow. This will be the piece that goes around the neck.
-
2Fasten the bow to the strip using small stitches so that they won't be easily visible. Make sure that it is placed in a central location on it.
-
3Add Velcro to the ends. Even if they are self adhesive, you will probably want to sew the ends of the strip and the Velcro to ensure that it lasts more than a few days.
-
4Let your cat try it on!


Warnings
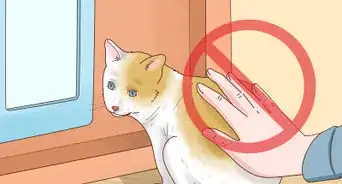
- Cats can get tangled in anything wrapped around their necks. Don't let your cat outside in his 'bowtie'.Thanks!
Things You'll Need
- Scissors
- Iron
- Thread and needle or sewing machine
- Velcro (preferably the iron on type)
-
Material / Fabric for the tie in the following dimensions:
- one piece 1.75 x 12 inches (adjust for the size of your own cat)
- one piece 2 x 5 inches (for the bow)
- two pieces 2.5 x 3.5 inches (for the bow)
- Safety pin or loop turner
References
- Original research source - http://www.instructables.com/id/Cat-bow-tie-pattern/