X
wikiHow is a “wiki,” similar to Wikipedia, which means that many of our articles are co-written by multiple authors. To create this article, 20 people, some anonymous, worked to edit and improve it over time.
This article has been viewed 183,853 times.
Learn more...
Biscuit joints are a method for gluing boards together along their edges to create a wider slab or plank without screwing or splicing them. This technique is used for making tabletops, furniture, and cabinets, and although it requires special tools, it is within the reach of most hobby woodworkers in a home woodshop.
Steps
-
1Gather the tools and materials you will need for the project. It is very helpful to have a good, flat, sturdy workbench for this woodworking operation. Briefly, you will need at least the following:
- A plate jointer, also known as a biscuit jointer.
- A saw.
- Measuring tape.
- Square.
- Wood glue/ Carpenter's glue.
- Clamps.
- Lumber.
-
2Select lumber of similar thickness. You can laminate lumber together of differing thicknesses if only one side will be visible, or if you have access to a power plane, but ideally, you will begin with sized, square material of the same thickness.Advertisement
-
3Edge and size the boards so they fit snugly together along their edges. If a beaded look is desired, a rounded edge common in nominal lumber is acceptable, as seen in the scrap material used for the illustrations.
-
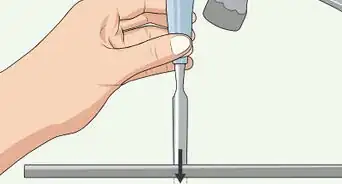
4Mark the location of the biscuits to be glued between the boards. Generally, the distance between biscuits will determine how strong the finished plank will be, and thinner lumber will hold better if the spacing is kept to a minimum. One inch nominal lumber joins fairly well at a twelve inch biscuit spacing, two inch lumber can be cut at sixteen to eighteen inches on center with good results.
-
5Set the cutting depth of the plate jointer. For single row biscuits, you will want to place the joints at the center of the board's edge, for double rows, cut each row at one third of the boards thickness.
-
6Cut the biscuit slots with the plate jointer. Make sure the lumber is secured or held tightly, as considerable force is required to push the blade into the work piece.
-
7Clean out the biscuit slots to remove sawdust or debris.
-
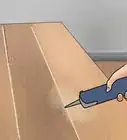
8Fill the slot about one fourth full of a good quality wood glue. Press the precut biscuits into the slot, and notice if excess glue runs over its edges. This excess can end up on the finished surface of your work, making it almost impossible to stain uniformly later if you desire to do so.
-
9Spread a small amount of glue along the edge of the board you are mating to the one you have inserted the biscuits into. Fill the respective biscuit slots one fourth full as you go.
-
10Fit the two boards together and make sure they are properly aligned. Then clamp them tightly and allow the glue to dry.
-
11Sand or plane down the finished side of your laminated plank when the glue has completely dried.Advertisement


Community Q&A
-
QuestionCan I use a router to make biscuit cuts?
 Community AnswerYes, if you have the correct cutter and make the cut slightly longer than the biscuit.
 -
QuestionCan I join the boards end to end (or in a "T" shape) with biscuits?
 Community AnswerYes, you can. It's always better to use dowels for a T joint, but it can be done.
Warnings
- Plate jointers have a high speed wood cutting blade which is concealed except during use, so keep fingers away from the cutting head when in use.Thanks!
- Keep your work area clean and make sure it is well lit.Thanks!
- Wear safety glasses when using woodworking power tools.Thanks!
Advertisement
Things You'll Need
- Plate jointer
- Saw
- Clamps
- Biscuits
- Glue
- Lumber
- Tape measure
- Square


About This Article
Advertisement