This article was written by Darlene Antonelli, MA. Darlene Antonelli is a Technology Writer and Editor for wikiHow. Darlene has experience teaching college courses, writing technology-related articles, and working hands-on in the technology field. She earned an MA in Writing from Rowan University in 2012 and wrote her thesis on online communities and the personalities curated in such communities.
This article has been viewed 14,892 times.
This wikiHow teaches you how to make your Twitch stream private on iPhone or iPad. Unfortunately, there is no way in Twitch to make a stream private, but you can block some users from interacting with you. YouTube, however, does have the ability to create private streams, so this wikiHow will show you how to use YouTube to stream privately if you have at least 1,000 subscribers[1] .
Steps
Method 1
Method 1 of 2:Streaming with YouTube
-
1Open YouTube. This app icon looks like a white play button inside a red rectangle. You can generally find this app on your home screen.
- Log in if prompted.
- You have to have at least 1,000 subscribers to live stream on YouTube from your phone. If you do not have 1,000 subscribers, you can stream via webcam or desktop on your computer.
- Your YouTube channel will have to be verified with your phone number for this to work, which can take up to 24 hours[2] .
-
2
-
3Tap Go Live. You’ll find this in the tile to the right.
-
4Type a title.
-
5Tap to select a privacy level. Since you don't want your stream to be public, you can choose one of the following options:
- Select “Unlisted” if you want to be able to share a link with specific people. Nobody else will be able to find your stream unless they have the link.
- Select “Private” if you don't want anyone else to see your stream.
-
6Tap Next. You will see a countdown and your camera will take a picture to use as your stream thumbnail.
-
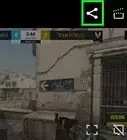
7Tap Share. If you want to share a link to your unlisted stream, choose this option to open a list of apps to share with.
-
8Tap Go Live. Your live stream will begin and everything presented in the camera will be broadcasted.
-
9Tap Finish to end your stream.


Method 2
Method 2 of 2:Blocking Users on Twitch
-
1Open Twitch. This app icon looks like a white chat bubble on a purple background. You can generally find this on your home screen. Though you can't prevent people from viewing your Twitch stream, you can use this method to prevent certain users from contacting you.
- Log in if prompted.
- If you don’t have Twitch downloaded, you can get it for free from the App Store .
-
2Tap your avatar. You’ll find this in the upper left corner of your screen. Your profile page will load.
-
3Tap Go Live. You’ll find this under your avatar.
- If this is your first time streaming with the Twitch app, you will have to allow the app to use your camera and microphone as well as go through a tutorial.
-
4Type in a title for your stream. You can do this by tapping next to the pencil icon.
-
5Tap the drop-down menu. You need to select a category to stream in, like Just Chatting or Makers&Crafters.
-
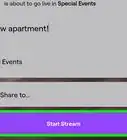
6Tap Start Stream.
-
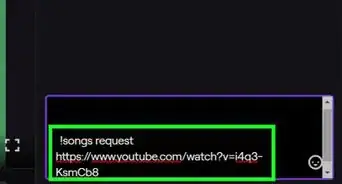
7Tap the user you want to block. In the right side, you will see a list of active viewers, including who you might want to block. A menu with all that user’s options slides appears.
-
8Tap Block. You will have to confirm this action.
- Once you confirm blocking the user, they can still view your Twitch feed and streams, but they can’t comment or contact you.


References
About This Article

1. Open YouTube.
2. Tap the capture icon.
3. Tap the Go Live icon.
4. Type your stream title.
5. Set your privacy.
6. Tap Next.
7. Tap Share to share your stream.
8. Tap Go Live.