This article was co-authored by Noël Reid-Killings and by wikiHow staff writer, Amber Crain. Noël Reid-Killings is a Professional Hair Stylist and the Owner of Noël New York Salon & Boutique. With over a decade of experience, Noël specializes in curating and customizing hair solutions for all hair types and textures. She has worked with countless A-list celebrities including Alicia Keys, Ciara, Yara Shahidi, and Simone Missick. Her work has been featured on makeover shows and in magazines including Essence, Sophisticates Black Hair, Teen Vogue, Elle, 21Ninety, WWD, POPSUGAR, Allure, The Cut, The Huffington Post, and Swaay.
There are 14 references cited in this article, which can be found at the bottom of the page.
This article has been viewed 880,673 times.
If you love straightening your hair but can't seem to avoid the frizz that comes with it, we've been there! Naturally curly hair can be tough to tame, but it can be done. We've researched all the best tips on straightening curly hair with frizz-free results so we could share them with you. Below, we'll walk you through the entire straightening process and finish up with few tricks on how to extend the life of your straight style.
Steps
Method 1
Method 1 of 15:Wash your hair with moisturizing shampoo.
-
1Start with clean hair for smooth, frizz-free results. Use a gentle shampoo made with hydrating ingredients like glycerin, aloe vera, and coconut oil. Wet your hair with warm water, lather up, and rinse with warm water. Avoid shampoos with alcohols and sulfates since those tend to dry out hair and create frizz.[1]
- Avoid hot water since it strips hair of its natural oils and causes frizz.
- Your hair's natural oils can also help protect it from heat-styling damage.
Advertisement

Method 2
Method 2 of 15:Apply a strengthening treatment.
-
1A protein or bond building treatment preps your hair for heat styling. Hair straightening involves a lot of hot tools that can damage your hair. Using a strengthening treatment first can help you minimize that! Most strengthening treatments are applied like conditioner and rinsed out after several minutes. Check your product’s packaging instructions for specific details and instructions.[2]
- Some products are leave-in and others require rinsing. Be sure to check!
- If you don’t have a strengthening treatment, do a deep-conditioning treatment. A big dose of hydration helps prevent frizz and minimize damage.
Method 3
Method 3 of 15:Squeeze out excess moisture with a towel.
-
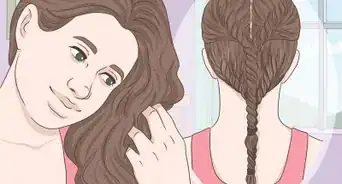
1Use a microfiber towel or an old T-shirt to gently squeeze your hair. Squeeze and dab your wet hair with the towel or shirt to get out as much moisture out as possible. Be gentle as your go! Vigorously towel-drying your hair can cause breakage and create frizz.[3]
- Avoid terry cloth towels since they’re too rough on your hair.
Advertisement
Method 4
Method 4 of 15:Detangle your hair with a wide-toothed comb.
-
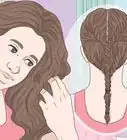
1A wide-toothed comb is the gentlest way to detangle wet hair. Start combing at the ends of your hair and work your way slowly up the shaft until you get to the roots. Since hair is fragile when it’s wet, avoid detangling with a fine-toothed comb or hair brush after washing it.[4]
- Spritz a detangling product on your hair first if you have knots and tangles.
Method 5
Method 5 of 15:Let your hair air-dry about 75%.
-
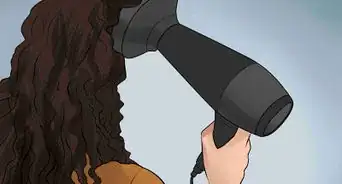
1The less you have to blow dry your hair, the better! If you have time to let your hair partially air-dry before heat styling it, take it! Air-drying your hair first shortens the blow-drying time and exposes your hair to less heat.[5]
- Any amount of air-drying you have time for is better than nothing.[6]
Advertisement

Method 6
Method 6 of 15:Apply heat protectant from root to tip.
-
1Thermal protectants prevent hair damage caused by heat styling tools. If you have fine hair, use a lighter, spray-on thermal protectant that won’t weigh down your locks. If your hair is on the thicker side, go with a cream thermal protectant instead. Whatever you choose, don’t skip out on this step! Putting a barrier between your hair and damaging heat is really important.[7]
Method 7
Method 7 of 15:Divide your hair into 4-6 sections.
-
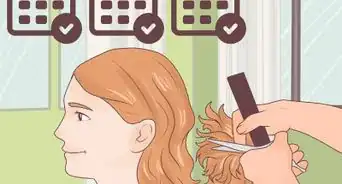
1Clip all the sections up and out of the way except the bottom one. Working in sections allows you to concentrate on 1 area at a time so you can get it super smooth and completely dry before moving on. Gently coil and clip each section up on top of your head with plastic hair clips. Leave the bottom section down since that’s easiest place to start blow-drying.[8]
- The sections don’t have to be perfect!
- If you’d like, apply a small amount of smoothing serum to each section from root to tip before you blow dry it.
Advertisement
Method 8
Method 8 of 15:Fit your blow dryer with a diffuser.
-
1The diffuser's concentrated air flow helps prevent frizz. Diffusers are flat, nozzle-shaped attachments that you fit on the end of any standard-sized hair dryer. The concentrated air flow is gentler on your hair and helps you achieve the smoothest finish possible.[9]
- If you don’t use a diffuser, the hot air disperses and creates frizz.

Method 9
Method 9 of 15:Use the low heat setting on your blow dryer.
-
1Using low heat takes a bit longer, but it’s worth it to avoid damage. Blow drying on a medium or high heat setting can cause major frizz and potentially damage your hair. Use the lowest heat setting your blow dryer has. If you let your hair air-dry 75-80% first, you might even be able to get away with using the cool setting.[10]Advertisement

Method 10
Method 10 of 15:Dry the first section with a medium round brush.
-
1Use a ceramic or boar bristle round brush for the smoothest results. Position the round brush under the bottom section of hair close to the roots and turn on the blow dryer. Aim the diffuser straight down at your hair and slowly roll the round brush through your hair to the ends, moving the diffuser with the brush at the same speed. Keep doing this until your hair is completely dry.[11]
- A ceramic round brush absorbs heat from your blow dryer to create ultra smooth results.
- A boar bristle round brush has tightly packed bristles that can help you achieve smooth, frizz-free locks.
Method 11
Method 11 of 15:Dry the remaining sections the same way.
-
1Work on 1 section at a time until all of your hair is dry. Continue the same process with the round brush and the diffuser, keeping the heat concentrated on the hair wrapped in the brush. Be sure to get every section completely dry before you move on! Flat ironing damp hair can cause serious damage. [12]Advertisement
Method 12
Method 12 of 15:Flat iron your hair in 1 in (2.5 cm) sections.
-
1Set the temperature to 300–350 °F (149–177 °C) for minimal damage.[13] Start at the hairline on 1 side of your head so you can work systematically. Grab the first section of hair and pull it taut. Clamp the hair between the flat iron’s plates as close to your roots as you can and pull the flat iron down the length of the hair. Then, move to the next section and do the same thing.[14]
- Keep going until all of your hair is straightened.

Method 13
Method 13 of 15:Finish up with a smoothing serum.
-
1A lightweight smoothing serum tames flyaways and adds shine. Pump a pea-sized amount of serum into your hand and rub your palms together to distribute the product. Then, run your hands through all of your hair, starting about 1–2 in (2.5–5.1 cm) from the roots and going all the way down to the ends.[15]Advertisement

Method 14
Method 14 of 15:Avoid touching your straightened hair.
-
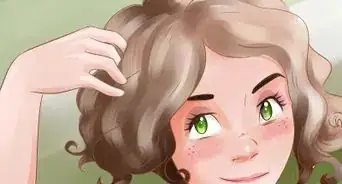
1Touching can strip your hair’s natural oils and cause frizz. Now that your hair is nice and smooth, it’s so tempting to run your fingers through it! If you do that, though, you’ll end up with frizz and the style won’t last as long. Your hair is also pretty fragile right now, so touching can lead to breakage.[16]

Method 15
Method 15 of 15:Sleep on satin pillowcase at night.
-
1The smooth surface reduces friction that leads to frizz. Cotton pillowcases can be rough on your hair because they create quite a bit of friction. Switch out your old pillowcase with a silk or satin one. You’ll wake up each morning with smooth, tangle-free hair and your style will last longer.[17]
- Satin and silk both work great—the main difference is the price. Satin is much more affordable than silk.[18]
Advertisement

Community Q&A
Did you know you can get expert answers for this article?
Unlock expert answers by supporting wikiHow
-
QuestionWhat is the best way to straighten curly hair?
 Noël Reid-KillingsNoël Reid-Killings is a Professional Hair Stylist and the Owner of Noël New York Salon & Boutique. With over a decade of experience, Noël specializes in curating and customizing hair solutions for all hair types and textures. She has worked with countless A-list celebrities including Alicia Keys, Ciara, Yara Shahidi, and Simone Missick. Her work has been featured on makeover shows and in magazines including Essence, Sophisticates Black Hair, Teen Vogue, Elle, 21Ninety, WWD, POPSUGAR, Allure, The Cut, The Huffington Post, and Swaay.
Celebrity Hair StylistLook for a salon that does Brazilian blowouts, which relaxes your hair so it stays straight.
Support wikiHow by unlocking this expert answer.
-
QuestionIs there a permanent hair straightener that does not use heat and is natural?
 Community AnswerNo, there isn't. However, using natural masks for your hair like egg and olive oil will make it look healthy and shiny.
 -
QuestionHow do I slick back my hair?
 Shay CagleCommunity AnswerBrush your hair back starting at your forehead, and then all the way around. Then use a generous amount of gel to slick it back into place. Lastly, after the gel dries a bit, take a wood bristle brush ( or any short bristle brush), and lightly go over the brushed back hair. Smooth it down with your hands.
 -
QuestionHow can I make wavy hair into permanent straight hair?
 Community AnswerYou can't make it permanently straight, but tips such as getting a Brazilian Blowout and using specific types of shampoos definitely helps.
 -
QuestionHow can I straighten my thick and curly hair at home?Community AnswerDivide your hair into small sections and straighten it with a blow dryer. After that, redo it with a flattening iron and then apply hairspray to keep it straight. Long lasting tip: Try to let your hair completely dry before straightening it to prevent ruining your curls.
-
QuestionIs there a way to straighten my hair naturally?
 Community AnswerBrush it out constantly after a shower, while it is still wet. Keep brushing it until it is dry.
 -
QuestionMy hair is rough and frizzy. How can I straighten my hair with shampoo and conditioner?Community AnswerGet a deep conditioner and rub it throughout your hair. Leave it in for 5-6 minutes. Wash it out and dry your hair with a cotton t-shirt to reduce frizzing and make your hair straighter.
-
QuestionHow can I straighten my hair so that it is straight forever?Community AnswerYou can get chemical straightening done, which will permanently straighten the hair you already have. However, once it grows out, you will have to get it redone.
-
QuestionCan it permanently straighten my hair if I mix products together?
 Community AnswerNo, it will not permanently straighten your hair.
 -
QuestionWhy did I lose my fringe three months after my hair was chemically straightened?Community AnswerWhat do you mean by "lose" it? Did it fall out? If so, you may have suffered chemical damage to the roots in that area. It could also be that your hair grew out -- or perhaps you're styling it differently?


-Step-17.webp)

References
- ↑ https://www.goodhousekeeping.com/beauty/hair/a28186415/frizzy-hair-tips/
- ↑ https://www.youtube.com/watch?v=3kTNuddh2Hw&t=36s
- ↑ https://www.naturallycurly.com/curlreading/regimen/this-is-why-your-hair-looks-frizzy-after-it-dries
- ↑ https://www.aad.org/public/diseases/hair-loss/insider/stop-damage
- ↑ https://www.naturallycurly.com/curlreading/regimen/this-is-why-your-hair-looks-frizzy-after-it-dries
- ↑ https://www.aad.org/public/diseases/hair-loss/insider/stop-damage
- ↑ https://www.naturallycurly.com/curlreading/articles/top-10-tips-to-straighten-curly-hair-without-frizz
- ↑ https://www.youtube.com/watch?v=3kTNuddh2Hw&t=56s
- ↑ https://www.self.com/story/blow-dry-mistakes
- ↑ https://www.naturallycurly.com/curlreading/regimen/this-is-why-your-hair-looks-frizzy-after-it-dries
- ↑ https://www.youtube.com/watch?v=3kTNuddh2Hw&t=118s
- ↑ https://www.teenvogue.com/story/top-ten-flat-iron-mistakes
- ↑ https://www.teenvogue.com/story/top-ten-flat-iron-mistakes
- ↑ https://www.youtube.com/watch?v=3kTNuddh2Hw&t=340s
- ↑ https://www.youtube.com/watch?v=3kTNuddh2Hw&t=518s
- ↑ https://www.naturallycurly.com/curlreading/curly-hair-care-methods/7-things-that-are-hurting-your-hair
- ↑ https://www.goodhousekeeping.com/home-products/a28037094/silk-pillowcases-benefits/
- ↑ https://www.naturallycurly.com/curlreading/curl-products/what-should-you-be-sleeping-on-silk-or-satin
About This Article

If you want to make your frizzy or curly hair straight, use a flat iron, also called a straightener, to smooth out your hair in sections. To start, apply a dime-sized amount of straightening product to your hair, which will protect it and keep it moisturized. Turn your flat iron on to the highest heat setting your hair can handle. For example, pick 250 for fine or damaged hair, 300 for medium hair, and 350 for thick or coarse hair. Put the top half of your hair up into a temporary ponytail or bun so you can focus on the bottom layer first. Once the iron heats up, iron the bottom layer of your hair in 1-2 inch sections, making sure to move the iron slowly from root to end so you don’t burn your hair. Once you’ve straightened the bottom layer of hair, undo your ponytail and do the same for the top layer. Finally, set your hair with a finishing serum or spray to keep it smooth. To learn how to get your hair straightened at a salon, read on!