This article was co-authored by wikiHow Staff. Our trained team of editors and researchers validate articles for accuracy and comprehensiveness. wikiHow's Content Management Team carefully monitors the work from our editorial staff to ensure that each article is backed by trusted research and meets our high quality standards.
wikiHow marks an article as reader-approved once it receives enough positive feedback. In this case, 94% of readers who voted found the article helpful, earning it our reader-approved status.
This article has been viewed 242,107 times.
Learn more...
Pegboard is pre-drilled hardboard often used as an organizational grid for tools and other supplies. It is tempered, so it is especially rigid, hard and strong. Installing a pegboard wall in your garage or home is a surprisingly inexpensive project, although it requires detailed measuring, leveling and wall support.
Steps
Part 1
Part 1 of 3:Buying Your Materials
-
1Measure the area on your wall where you want to install the pegboard. You should know the length and width of the area before you go to the home improvement store.
-
2Buy a piece of pegboard. Pegboard is usually sold in two by four, four by four and four by eight foot pieces. If you want an exact size, buy the larger size of pegboard and ask the large home improvement store to cut it to size.[1]
- Most box stores will do this free of charge or for a nominal fee.
- You can also install several pegboard sections in tiles along your wall.
Advertisement -
3Purchase furring strips to use as a frame. Cut them to the width of your pegboard.[2]
- A frame will allow you space between the wall and board to connect hangers. It will also support the pegboard and avoid damage to your wall.
-
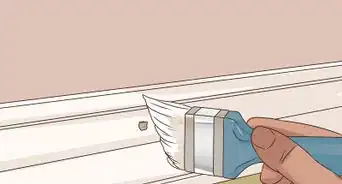
4Find a paint color that you want to use on your pegboard. It is sold in white or brown and can be left unpainted if you choose. In order to make a camouflaged pegboard for a craft room or kitchen, paint your pegboard the same color as your walls.[3]
- You can also use spray paint to create a contrasting pegboard installation.
-
5Paint the pegboard a few days ahead of time in the garage or outdoors. Painting in advance will reduce the smell of the paint. It will also mean the paint is cured before you hang anything.Advertisement


Part 2
Part 2 of 3:Mounting the Pegboard
-
1Use a stud finder to mark off your wall studs. If you can’t find the studs and you are hanging the pegboard on drywall, install wall anchors every 16 inches so that the pegboard is adequately supported.[4]
- Drilling into studs is preferable, since pegboards are often used to hang heavy tools or kitchen pots and pans.
-
2Ask a friend to help you install the furring strips. Hold them horizontally across the wall and place a level on top. Adjust until it is level, and then ask a friend to hold the strip while you drill long wood screws through the furring strips and into the studs or wall anchors.[5]
- For a small pegboard, two horizontal furring strips should be adequate. For larger installations, use three or four.
- Drill pilot holes through the furring strips before you place them against the wall and after you level it, so that you can match the strip with the wall anchor.
-
3Raise the pegboard up to cover the framing strips. Ensure it is level and then get ready to mount it with help from a friend.
-
4Screw the pegboard into the furring strips using 3/4 inch screws with washers. Screw the pegboard in at regular intervals, such as six inches apart, in a horizontal line. Repeat with remaining furring strips to secure the pegboard to the wall.Advertisement


Part 3
Part 3 of 3:Using the Pegboard
-
1Buy a pegboard organizer kit. Make sure it matches up to the pegboard interval of the board you purchased. Pegboards are available in 1/4 and 1/8 inch (0.6 and 0.3cm) holes.[6]
-
2Lay the hangers out on a large table. Experiment with the configuration by placing the tools, craft supplies or kitchen supplies next to the hanger.
-
3Install from the table to the pegboard to ensure the proper layout.
-
4Add additional screws and washers if your pegboard moves extensively when you install the hangers.Advertisement


Community Q&A
-
QuestionHow much space should you have behind a pegboard?
 wikiHow Staff EditorThis answer was written by one of our trained team of researchers who validated it for accuracy and comprehensiveness.
Staff AnswerwikiHow Staff EditorStaff AnswerYour pegboard should have about ½ inch (1.27 cm) of space behind it so that you can install hooks. If you get a ready-made pegboard with a frame, that space should be built in. Otherwise, you’ll need to create that space by building a frame or adding screw-in standoffs with spacers. -
QuestionCan you hang a pegboard with command strips?wikiHow Staff EditorThis answer was written by one of our trained team of researchers who validated it for accuracy and comprehensiveness.
Staff AnswerwikiHow Staff EditorStaff AnswerYou can, as long as the pegboard is small and you don’t plan to hang anything too heavy on it. Make sure the strips you choose are rated for the weight of the pegboard and anything you plan to put on it. -
QuestionHow do you install pegboard in a metal shed?wikiHow Staff EditorThis answer was written by one of our trained team of researchers who validated it for accuracy and comprehensiveness.
Staff AnswerwikiHow Staff EditorStaff AnswerMost metal sheds have thin walls. You may be able to drive heavy-duty deck screws through the walls to mount the pegboard. Put a small amount of roof and gutter silicone around the drill holes/washers to seal up any gaps and prevent moisture from getting into your shed. -
QuestionWhat's the easiest way to screw things like hooks that are screwed into walls, anchor screws, etc., into a wall so that it goes in straight and securely?
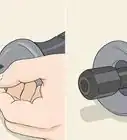
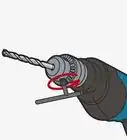
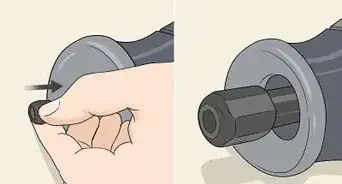
 Community AnswerBest way is to use a cordless or electric drill to drill a "pilot" hole. Pilot holes should be at least 1/16" smaller than the screw or hook diameter so the threads have something to grip to. Before drilling, compare the bit to the item being screwed into the wall. After marking the spot, tap a sharp finishing nail into it so your bit doesn't "skate." Some people have difficulty in drilling a hole that is at 90 degrees to the surface, because you must ascertain orientation of the bit not only left to right, but up and down as well. If you find this difficult, it helps to have another person viewing from the side to help you get lined up at 90 degrees.
 -
QuestionWhat should I do if I don't have a drill?
 Community AnswerBorrow, rent, or buy one. Using a plain screwdriver is not a viable option if you care about your hands.
 -
QuestionWe recently purchased a home that has peg board installed on three walls of a room behind the garage. There is an offensive odor in the room at all times, could it be from the peg board?Community AnswerThere could be a dead animal behind the peg board wall. Removing the peg board will be the only way to find out.
-
QuestionWill this method work for concrete walls?Community AnswerYes. You will need to use masonry screws to mount the furring strips to the concrete wall. You need to to drill a pilot hole for the masonry screws using a masonry bit. If you will be drilling a lot of holes into concrete, it may be worthwhile to rent a hammer drill.
-
QuestionHow thick do the furring strips have to be?Community AnswerTypically, furring strips are 1" thick by 2" - 3" width by 4', 6', 8', or 10' length. However, it is not unusual for them to be 3/4" to 7/8" thick, depending on whether they are dried and planed to be smooth surfaced strips.
-
QuestionWhat kind of pegs would be best?Community AnswerUnless you know exactly what hooks you want, buying an assortment works well. There are many styles, and what looks right may not be best. You will probably use short hooks the most, and only a few speciality shapes. But no matter what - your peg board will be revised and changed as time goes by. Spare hooks are required for when you change it up and revise your workflow.
-
QuestionHow much weight can a pegboard hold?
 Community AnswerApproximately 20 lb per pounds per hook, although longer hooks will exert more force on structure than shorter ones.
Things You'll Need
- Measuring tape
- Pegboard
- Furring strips
- Stud finder
- Three inch (7.6cm) wood screws
- 3/4 inch (1.9cm) wood screws
- Washers
- Plastic wall anchors
- Level
- Power drill
- Paint (optional)
- Pegboard organizing kit
- Hammer
- Nails

References
- ↑ https://www.semiglossdesign.com/how-to-build-a-sturdy-pegboard
- ↑ http://www.bobvila.com/articles/hang-pegboard/#.U21Gcq1dWnA
- ↑ https://www.thekitchn.com/how-to-hang-a-kitchen-pegboard-242245
- ↑ http://www.marthastewart.com/267319/install-a-pegboard
- ↑ https://www.blackanddecker.com/ideas-and-inspiration/projects/hanging-a-pegboard-in-your-garage
- ↑ https://sawdustsisters.com/how-to-hang-pegboard/
About This Article
Before trying to install pegboard, measure the area on the wall where you plan to install it. If you want the pegboard to fit the area exactly, buy a larger size and ask the hardware store to cut it to your measurements. Alternatively, buy smaller pegboards to install like tiles. Next, install furring strips horizontally on your wall to keep space between the pegboard and the wall to prevent wall damage. To install the pegboard, lift it into place, have someone hold it, and screw it to the furring strips. For tips on how to paint your pegboard and what to do with an organizer kit, read on!