This article was co-authored by wikiHow staff writer, Hunter Rising. Hunter Rising is a wikiHow Staff Writer based in Los Angeles. He has more than three years of experience writing for and working with wikiHow. Hunter holds a BFA in Entertainment Design from the University of Wisconsin - Stout and a Minor in English Writing.
There are 11 references cited in this article, which can be found at the bottom of the page.
Learn more...
You're probably pretty antsy to start enjoying the sweet flavors of fresh-grown marjoram from your garden. Since there are a few times when you can harvest these herbs throughout the season, we’ll help you recognize when they’re ready to pick. Keep reading to find out how to collect and store your marjoram so you can add it to any of your recipes!
Steps
Method 1
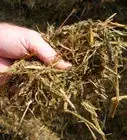
Method 1 of 11:Harvest when stems are 6–8 in (15–20 cm).
-
1Marjoram is usually ready for its first harvest in the summer. Wait until marjoram is tall enough so it establishes roots in your garden and survives after the harvest. Check on your plants throughout the growing season and measure the stems to see if they’ve reached the right height. If they’re still a little short, make sure they’re getting full sun during the day and enough water so they form healthy growths.[1]Advertisement

Method 2
Method 2 of 11:Pick marjoram before the flower buds bloom.
-
1Your herbs taste better before they flower. The flower buds look like small balls on the ends of the marjoram stems.[2] When you see these on your plant, your marjoram has the highest amount of aromatic oils that give the leaves their sweet flavor.[3]
- You can still pick marjoram after the flowers open up, but it may taste bitter.

Method 3
Method 3 of 11:Wait until mid-morning after the dew dries.
-
1The leaves have more flavorful oils in the morning. Give the leaves a chance to dry out in the early morning so they’re less likely to go bad. Just make sure you start harvesting before the hot afternoon sun comes out since it may make the leaves less flavorful.[4]
- If it recently rained, wait until after you’ve had 2 warm sunny days before you harvest.[5]
Advertisement

Method 4
Method 4 of 11:Pinch off as many leaves as you’ll use.
-
1Only take the leaves you need for your recipes each day. Start taking leaves from the ends of the stems since they’ll grow back easier. Just pinch the base of the leaf where it connects to the stem to remove it. The leaf should separate easily, but you can use pruning shears if it doesn’t break off.[6]
- You can safely take off up to 75% of the foliage and your marjoram will still survive.[7]
- You can also prune entire stems if you want to collect multiple leaves, but leave at least ⅔ of the plant alone so it regrows.

Method 5
Method 5 of 11:Cut the stems after the flowers bloom to regrow them.
-
1Trimming the stems back encourages new growth. Eventually, the buds will open up into small white or pink flowers. Use a pair of pruning shears to prune the stems back a few inches above the ground.[8] Make your cut just above a pair of leaves to help your marjoram branch out and grow again.[9]
- You can keep and use the leaves on these stems, but they may taste a little bitter.
Advertisement

Method 6
Method 6 of 11:Collect marjoram when it grows new flower buds.
-
1You can usually start harvesting again early in the fall. A lot of people enjoy the flavor of marjoram taken from a fall harvest more than the summer.[10] Once your plants are at least 6 inches (15 cm) tall and new buds have grown on the stem tips, you can either remove the leaves individually or cut off an entire stem to use.[11]

Method 7
Method 7 of 11:Remove half the height at the end of a perennial season.
-
1Marjoram will come back in the spring in zones 9 and above. Marjoram is a tender perennial, so it only survives through mild winters without any frost. Before the first frost in your area, use your pruning shears to cut the stems down to half the size to help your plant harden off during the colder season so it survives into spring.[12]
- Take your last harvest about a month before the first frost date in your area since it may encourage new growths that won’t survive the winter.[13]
Advertisement

Method 8
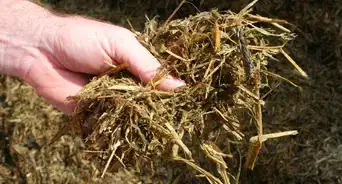
Method 8 of 11:Harvest the entire plant if you’re growing it as an annual.
-
1Marjoram won’t survive in the ground through cold temperatures. If you live in Zone 8 or lower, you can only keep marjoram outdoors as an annual. Keep harvesting your marjoram up until the first frost in your area. You can either take the leaves individually as you need them or cut the stems down to the soil to collect the entire plant.[14]

Method 9
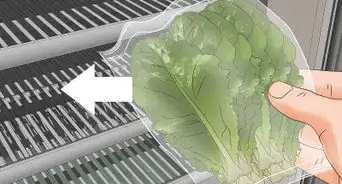
Method 9 of 11:Wash and dry the leaves before using them.
-
1This cleans off any dirt and dust on the surface. Run your fingers over the leaves and feel for any dirt or grit. Rinse the leaves under some cold water and drain all the excess water.[15] Pat your marjoram dry with a paper towel or use a salad spinner to get rid of water that’s still on the surface.[16]
- Excess water could cause the leaves to spoil or make it take longer for marjoram to dry out.
Advertisement

Method 10
Method 10 of 11:Keep fresh marjoram refrigerated.
-
1You can save your leaves for up to 2 weeks if you don’t use them. Wrap your marjoram leaves in a damp paper towel and slide them into a resealable plastic bag. Whenever you want to use marjoram for your recipes, take out what you need and chop it up. Once the leaves become soft, discolored, or smelly, throw them away.[17]

Method 11
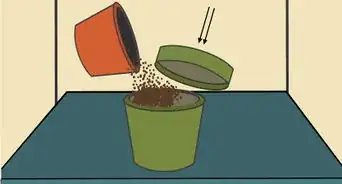
Method 11 of 11:Dry your marjoram to preserve it longer.
-
1Dried marjoram lasts up to 1 year. People most commonly dry entire marjoram stems with the leaves still attached. Tie the stems into a small bundle and hang them upside down in a warm, dry spot that’s out of the sun. Leave the marjoram to dry until the leavers easily crumble between your fingers. After that, store the dried leaves in an opaque, airtight container.[18]
- You can also dry leaves in the microwave. Put a layer of leaves between pieces of paper towel and run the microwave for 1–2 minutes on high power.
Advertisement

Warnings


References
- ↑ https://plantvillage.psu.edu/topics/marjoram/infos
- ↑ https://web.extension.illinois.edu/herbs/marjoram.cfm
- ↑ https://hgic.clemson.edu/factsheet/herbs/
- ↑ https://content.ces.ncsu.edu/harvesting-and-preserving-herbs-for-the-home-gardener
- ↑ https://extension.missouri.edu/g6470
- ↑ https://extension.umn.edu/vegetables/growing-herbs#harvesting-930514
- ↑ https://content.ces.ncsu.edu/harvesting-and-preserving-herbs-for-the-home-gardener
- ↑ https://www.almanac.com/plant/marjoram
- ↑ https://extension.umn.edu/vegetables/growing-herbs#harvesting-930514
- ↑ https://www.researchgate.net/publication/268291887_Yield_and_quality_of_sweet_marjoram_herb_depending_on_harvest_time
- ↑ https://web.extension.illinois.edu/herbs/marjoram.cfm
- ↑ https://extension.missouri.edu/g6470
- ↑ https://content.ces.ncsu.edu/harvesting-and-preserving-herbs-for-the-home-gardener
- ↑ https://extension.missouri.edu/g6470
- ↑ https://sfyl.ifas.ufl.edu/lawn-and-garden/spring-herbs/
- ↑ https://extension.umn.edu/vegetables/growing-herbs#harvesting-930514
- ↑ https://www.stilltasty.com/fooditems/index/17656
- ↑ https://content.ces.ncsu.edu/harvesting-and-preserving-herbs-for-the-home-gardener
- ↑ https://extension.umn.edu/vegetables/growing-herbs#harvesting-930514
- ↑ https://plantvillage.psu.edu/topics/marjoram/infos
About This Article