X
This article was written by Jack Lloyd. Jack Lloyd is a Technology Writer and Editor for wikiHow. He has over two years of experience writing and editing technology-related articles. He is technology enthusiast and an English teacher.
This article has been viewed 2,940 times.
This wikiHow teaches you how to free up space for photos on an iPhone or iPad by using iCloud Photo Library, deleting superfluous photos, and changing your recording settings.
Steps
Part 1
Part 1 of 4:Enabling iCloud Photo Library
Part 1
-
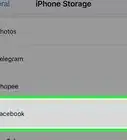
1Open your iPhone's or iPad's Settings. It's the grey gear icon that's on one of your Home screens (or in a folder entitled "Utilities").
-
2Scroll to the fourth group of options and tap iCloud.Advertisement
-
3Select Photos.
-
4Slide the iCloud Photo Library switch right to the "On" position. It should turn green, signifying that your entire Camera Roll is now uploading to iCloud.
- In order for the iCloud Photo Library to work on your device, you'll need to have enough storage in your iCloud account for your entire library to fit.
- While in the "Photos" menu, you can also slide the My Photo Stream switch off to disable Photo Stream, which also eats up photo space.
-
5Exit the Settings app. After your photos finish uploading to your iCloud Photo Library, you can delete any undesired duplicates from your iPhone.Advertisement


Part 2
Part 2 of 4:Deleting Unwanted Photos or Videos
Part 2
-
1Open your iPhone's or iPad's Photos. This is the multicolored pinwheel icon on one of your Home screens.
- If you can't find the Photos app on any of your Home screens, check your folders as well.
-
2Tap Albums. This is in the bottom right corner of your screen.
-
3Select an album. If you want to view all of your photos in one place, you can select Camera Roll in the top left corner of the page.
-
4Tap Select. This is in the top right corner of your screen.
-
5Select each photo you'd like to delete.
-
6Tap the trash can icon. It's in the bottom right corner of your screen.
-
7Tap Delete Photos. Depending on how many photos you're deleting, this button will change. For example, if you're deleting 12 photos, the button will read "Delete 12 Photos."
-
8Tap < Albums. You'll find this in the top left corner of your screen.
-
9Scroll to the Recently Deleted album and select it.
-
10Tap Select.
-
11Tap Delete All. It's in the bottom left corner of the screen.
-
12Tap Delete Photos. Doing so will permanently remove your selected photos from your phone, thereby clearing up space for more photos to follow.Advertisement


Part 3
Part 3 of 4:Changing Your Camera and Video Recording Preferences
Part 3
-
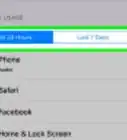
1Open your iPhone's or iPad's Settings. It's the grey gear icon that's either on one of your Home screens or in the "Utilities" folder.
-
2Scroll to the sixth group of options and select Photos & Camera.
-
3Scroll to the bottom of this menu.
-
4Slide the Keep Normal Photo switch left to the "Off" position. It should turn green. Doing this will prevent your iPhone from keeping the normal exposure of a photo that was taken with HDR enabled, which will cut down on the amount of space each individual photo takes.
-
5Select Record Video. It's in the "Camera" group of options above the "Keep Normal Photo" slider.
-
6Select a recording resolution. Not all iPhones or iPads will have every option listed here:
- 720p HD at 30 FPS - Takes up 60 MB per minute.
- 1080p HD at 30 FPS - Takes up 130 MB per minute.
- 1080p HD at 60 FPS - Takes up 165 MB per minute (iPhone 6S/iPad Pro and up).
- 4K at 30 FPS - Takes up 350 MB per minute (iPhone 6S/iPad Pro and up).
-
7Tap < Photos & Camera. This is in the top left corner of your screen.
-
8Select Record Slow-mo. Only iPhone 6S, iPhone 6S Plus, iPhone 7, and iPad Pro users will see this option.
-
9Select a slow-mo resolution. Your options include:
- 1080p HD at 120 FPS - 350 MB per minute.
- 720p HD at 240 FPS - 300 MB per minute.
-
10Exit the Settings app. Your videos will now be recorded in a lower resolution. If you shoot a lot of video, this will make a noticeable difference in the amount of space your videos take up.Advertisement


Part 4
Part 4 of 4:Disabling HDR and Live Photos
Part 4
-
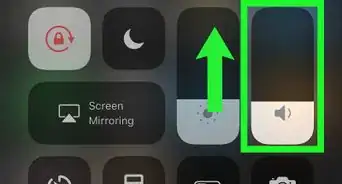
1Open your iPhone's or iPad's camera. This is the camera-shaped icon on one of your Home screens.
- You can also swipe up to open the Control Center and then tap the camera icon in the bottom right corner.
-
2Tap the orange circle at the top of your screen. This will disable the "Live Photos" feature. Live Photos combine a burst of photos into one exposure—disabling this feature will clear up a significant amount of room for future photos.
- If you don't have an iPhone 6S or newer model (or an iPad Pro), you won't have this option.
- If this circle is white, the Live Photos feature is already disabled.
-
3Tap the HDR option. This is to the left of the Live Photos circle. Tapping it will disable the "High Dynamic Range" (HDR) setting, which compresses multiple exposures into one photo.
- If HDR has a slash through it, it's already disabled.
Advertisement


Warnings
- Deleting photos from your Photo Stream album will not delete them from your Camera Roll.Thanks!
Advertisement


About This Article
Advertisement