wikiHow is a “wiki,” similar to Wikipedia, which means that many of our articles are co-written by multiple authors. To create this article, 13 people, some anonymous, worked to edit and improve it over time.
This article has been viewed 294,773 times.
Learn more...
It is estimated that there are around one billion personal computers around the world, and with every single desktop computer, there is also a monitor attached to it. Every day, hundreds of computer monitors break down, and if you have a LCD monitor that you bought fairly recently and have questioned why it won't turn on anymore, it's most likely a power problem that can be fixed to save you hundreds of dollars. This guide will specialize on the computer monitor model LG L196WTQ-BF, but most monitors will follow similar design and can generally be fixed using the same instructions.
Note: For other monitors, different capacitors will be needed.
Steps
-
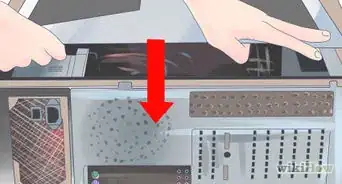
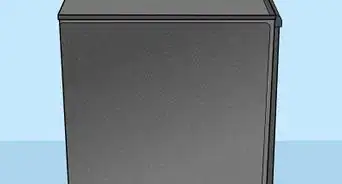
1Remove the stand. It uses four screws and can be easily removed from the back of the monitor. This is shown by the red arrows in the picture.
-
2Lay the monitor down carefully, backside up. Remove the other 4 screws that are holding down the case.
-
3This next part is the hardest step, and this might damage the edges of the screen cover, but usually they aren't visible. The monitor cover is made up of 2 plastic covers joined at the sides and in order to open you must force a separation. The picture shows that the screwdriver was placed in the middle of the covers and made a small space. The screen is held down by plastic locks around the screen and you will use the screwdriver to open these locks, this is why the slotted (Straight) screwdriver is mandatory.
-
4Using this small space, turn the screwdriver to cause the locks to come undone, using this technique you must go around all the sides of the monitor. This step gets easier and easier as you progress, so if your having trouble starting don't worry it will get easier.
-
5Once the cover is removed the main body of the monitor can be seen.
-
6Remove the side panel.
-
7Remove the tape and unplug the cable that is located at the top. This is the display panel signal cable.
-
8Remove the tape and unplug the cable that is located at the bottom. This is the control panel cable. This cable has a lock, so it must be pressed and taken out at the same time.
-
9Unplug the cable that is located to the side. this also has a lock and must be pressed to release. This four cables are the back light plugs.
-
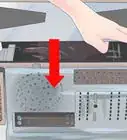
10Turn over the metal casing to reveal the driver board and power board. You must remove the power cable that is going to the driver board shown by the arrow.
-
11To remove the power board you must remove the 4 screws listed by the picture.
-
12The capacitors are located at the bottom right, and the cluster is shown in this picture. The capacitor list and location for this specific model is listed below. The locations should be listed on the board itself.
-
13Now using a soldering iron you can remove the bad capacitors. Flip the power board and use the soldering iron to the metal stubs that relate with the capacitors that needs to be removed. This should create a new hole for the new capacitors to fit in.
-
14Now fit the capacitors according to the placement and solder them in.
-
15Now reverse through this guide to reassemble the monitor.


Community Q&A
-
QuestionMy Acer LCD powers off after 15 minutes. I already changed the big capacitor but it didn't help. Do you have any other suggestions?
 Community AnswerYou may try re-checking the heat sink of your Secondary Diode and/or the Power IC.
 -
QuestionMy LCD monitor is brighter than normal and the pictures are changing slowly. What should I do?
 XxN00B Slayer456456XxCommunity AnswerYou may need to turn down the brightness of your monitor. Then put it in sleep mode. Turn off your computer. Then turn back up your computer, and monitor.
 -
QuestionMy flat screen LCD monitor is showing random colors. How do I fix it?
 Community AnswerInvert colors may be on, so you may need to go into settings and deactivate it. If this doesn't work, contact your tech support.
 -
QuestionIt turns on then right back off! What should I do?Community AnswerYou will need to replace your computer's power supply.
-
QuestionHow do I remove ghosted images from my LCD screen?
 Community AnswerIf they are from the RMB menu (the menu from right clicking) and not burned onto the screen, try this: Win+R (the windows button and "r" at the same time), then type "tskill dwm" into the box that appears in the lower left.
 -
QuestionWhat do I do if my computer monitor is just blinking and not displaying anything?Community AnswerCheck to see if your graphics card is working properly or at all. You can do this by testing it with another monitor that you know works.
-
QuestionMy Acer LCD Monitor is on but the CPU is on 10 seconds, then turns off. What can I do?Community AnswerYou need to connect both a power cord and HDMI cable to the computer from monitor, make sure both are connected.
-
QuestionMy monitor isn't open. It is saying Analog Input, what can be the problem?Community AnswerYou need to connect both a power cable and a VGA/HDMI cable to the computer, it sounds like you only had a power cable working.
-
QuestionHow do I fix a white line that's running from top to bottom on my LCD monitor?Community AnswerThat is either the monitor dying/having errors or your graphics card is out of date. Try looking online for updated drivers. If that does not work, your monitor might be old and dying.
-
QuestionHow do I fix my LCD monitor's heating problem?
 Community AnswerLCD monitors are naturally hot, try keeping the monitor in an open space to prevent heat from building up.
Warnings
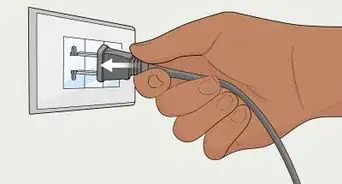
- The power cable should be unplugged at the start and every step of this guide.Thanks!
Things You'll Need
-
For Monitor LG L196WTQ-BF LCD monitor, the capacitors needed are:
- 2 x 1000uf 25v caps at C206 and C202
- 2 x 1000uf 16v caps at C205 and C208
- 1 x 680uf 25v cap at C203
- 1 x 470uf 25v cap at C207
- Slotted (straight) screwdriver and Philips screwdriver
- Soldering iron and solder