This article was written by Nicole Levine, MFA. Nicole Levine is a Technology Writer and Editor for wikiHow. She has more than 20 years of experience creating technical documentation and leading support teams at major web hosting and software companies. Nicole also holds an MFA in Creative Writing from Portland State University and teaches composition, fiction-writing, and zine-making at various institutions.
The wikiHow Tech Team also followed the article's instructions and verified that they work.
This article has been viewed 116,602 times.
This wikiHow teaches you how to use draw or paint on a photo using an Android phone or tablet. You'll need an app like PicsArt Color Paint or You Doodle to get started--you download either for free from the Play Store.
Steps
Method 1
Method 1 of 2:Using PicsArt Color Paint
-
1
-
2Tap Start Drawing. It’s the pink button at the bottom-center of the screen.
- If you don’t see Start Drawing, tap the left panel with the + at the center to start a new project.
Advertisement -
3Tap the photo icon. It’s the icon that resembles a photo of mountains with a “+” sign at its bottom-left corner. It’s at the top of the screen.
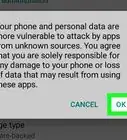
- Tap Allow if prompted to give PicsArt permission to access your photos.
-
4Scroll down and select a picture to draw on. This will open the picture in editing mode.
- You can also tap the camera icon and take a new photo instead.
-
5Arrange the photo. Tap and hold in the center of the picture to drag it to a new position. You can also edit and arrange the photo by tapping and dragging on the icons in the photo’s corners:
- Ⓧ: Delete the picture.
- ⤡: Change the picture’s size.
- ⟲: Rotate the picture.
-
6
-
7Tap the blue color wheel icon. It’s in the toolbar on the bottom-left of the screen. This opens the color picker.
-
8
-
9Tap the paintbrush icon. It’s in the toolbar at the bottom of the screen to the right of the color wheel icon. This opens the brush picker.
-
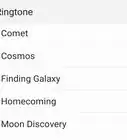
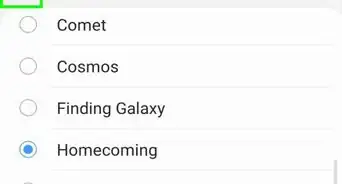
10Select a brush. Swipe through the brush types until you find one you like. You can also adjust the sliders for each brush to change the size or opacity (see-through) of each brush.
- You can tap the ^ icon in the top-right corner of the brush selector window to view the brushes full-screen.
- Swipe-down on the brush selector to hide it.
-
11Draw on your picture. Use your finger to draw on the screen. You can change the color and brushes at any time. You can also use other tools to refine your drawing.
- Tap ↩ to undo any mistakes you make.
- Tap the eraser tool to erase specific areas.
-
12Tap →. It’s in the top-right corner. This takes you to the "Save and Share" page.
-
13Tap Gallery. This saves the picture to your Android’s gallery.Advertisement


Method 2
Method 2 of 2:Using You Doodle
-
1
-
2Tap Import. It’s at the top of the screen.
-
3Tap Draw on Top of Photo. It’s the last option in the menu. A list of sources will appear at the bottom of the screen.
-
4Tap your photo gallery icon. If you use Google Photos, tap Photos. Otherwise, look for Gallery or Photo Gallery.
-
5Tap the photo you want to draw on. This opens the photo in the crop tool.
-
6Crop the photo to the desired size. Drag the corners or edges of the rectangle to surround the part of the photo you want to use, then tap Crop at the top of the screen.
- To select the whole photo, tap the first icon (the square with two arrows) at the bottom-left corner of the screen.
- If you want to rotate the photo, tap the curved arrow the bottom of the screen.
-
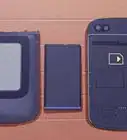
7Tap OK. It’s at the top-right corner of the screen. The photo will now open in the drawing editor.
-
8Tap the brush icon. It’s at the bottom of the screen. A list of options for your brush will appear.
-
9Customize your brush and tap OK. Select either a color or pattern to draw with, and then use the sliders to adjust size and opacity.
- Tap Fill to select a single color from the palette, or select one of the pattern options at the top of the screen.
- Drag the “Size” slider to the right to increase the brush size, or left to decrease it.
- Drag the “Opacity” slider to the left to make the brush color or pattern more see-through, and right to make it more solid/opaque.
-
10Use your finger to draw on the picture. If you make a mistake, tap the curved arrow at the bottom-left corner to undo your last action.
-
11Tap Export. You will now have the option to save or share your edited photo.
-
12Tap Save. A list of file types will appear.
-
13Tap your preferred format. Select either PNG or JPG. The quality is similar, but it takes a little longer to save a PNG file.
-
14Type a name for your photo and tap OK. This saves your edited photo to your Android’s photo gallery.Advertisement


About This Article