X
wikiHow is a “wiki,” similar to Wikipedia, which means that many of our articles are co-written by multiple authors. To create this article, volunteer authors worked to edit and improve it over time.
This article has been viewed 20,038 times.
Learn more...
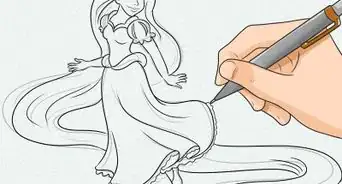
Do you want to learn how to draw a realistic face? Learn how to draw Belle from Disney's Beauty and the Beast in a couple of steps. This article is helpful for people who have experience in drawing. With the help of this article and practicing on your own, you can become a better artist.
Steps
-
1Draw the basic outline of Belle by looking at the reference picture. This should be done lightly so that you can erase if needed
-
2Draw in the eyes, nose, and lips. You can draw a vertical line down the center of the face, and then draw a horizontal line halfway between the bottom of the top. This determines where you will the draw the eyes. Then, divide the bottom portion in half, drawing a line in the middle. This is where the nose should be. Divide the remaining portion in half, and that is where the mouth will be.Advertisement
-
3Identify the light source in your picture. This determines where you'll be shading. For this picture, the light source is coming from the left, meaning that you will be lightly shading on the right side of her face and neck.
-
4Start shading in the hair. Do this by creating light pencil strokes in the middle of her hair near her parting and move your way toward the edges.
-
5Now shade the rest of the hair, starting from the left side. You can do this by using your pencil to create light pencil strokes all throughout her hair. After you are done with this, use a small piece of tissue or a Q-tip to blend it out. Use the tip of the Q-tip and hold it as a pencil as if you erasing. If you use tissue, you can take a small piece and wrap it around your index finger and rub it in the areas that need blending.
-
6Use a 2B or 4B pencil to go over the darker areas of her hair. This would be near the edges of her hair and near her forehead, and also where her hair is parted. If you don't have a 2B or 4B pencil, just use your normal pencil and go over those areas so they are darker. Use tissue or a Q-tip to blend these areas. Also, use the very tip or edge of your eraser to create highlights in the hair by erasing thin strands.
-
7Shade in the eyebrows and her pupil, and then lightly shade the rest of her eyes. Also, go over her upper waterline with your pencil to make it look thicker, and draw in her eyelashes.
-
8Lightly shade in the edge of her nose and blend it lightly if needed.
-
9Begin shading the mouth. For this part, lightly shade the upper lip and the bottom part of the upper lip should be darker, so use a 2B pencil. Use a 2B pencil for the rest of the upper lip, but apply less pressure so it is lighter. The bottom lip should have a highlight around the center, and the rest of it should be shaded in using a 2B pencil.
-
10Shade the rest of her hair that is tied back in the ponytail. Shade the edges of the ponytail darker than the rest.
-
11Shade in the right side of her face and neck lightly. Use the tissue or Q-tip to blend.
-
12Lightly fill in the collar of her clothes and the top of her dress. Shade the edges darker then the rest and blend it in lightly.Advertisement


Community Q&A
-
QuestionCan I color it and not shade it?
 Community AnswerYes, this is completely up to you.
 -
QuestionShall I color her in, or would that spoil it?
 Community AnswerBe creative. Draw the same picture twice, then color one of them in and see which looks better.
Things You'll Need
- paper
- pencils (preferably pencils with different hardness and softness; (6B, 4B, 2B, HB, F, H, 2H)
- eraser
- tissue or Q-tips


About This Article
Advertisement