X
wikiHow is a “wiki,” similar to Wikipedia, which means that many of our articles are co-written by multiple authors. To create this article, 13 people, some anonymous, worked to edit and improve it over time.
This article has been viewed 101,332 times.
Learn more...
Pine cones are the reproductive organs of pine trees. This tutorial will show you how to draw a pine cone.
Steps
-
1Draw an upside-down teardrop shape, tilted to the right. Round out the pointy end so it looks more like a large almond.
-
2Sketch the scales overlapping each other. Make them like fish scales, vaguely trapezoidal and becoming smaller towards either end, with bigger sections in the middle.
-
3Outline the pine cone's shape over the sketch with a neat line. Detail the scales' shape.
-
4Add oval/round shapes on the scales. Finish up with a little stem on top of the cone, with short vertical lines to indicate the fractures in the wood.
-
5Line the drawing with black ink. Try to make a modular line, which passes from a thin to a thick line and vice versa. This will make your drawing look better and more professional.
-
6Color the inked drawing. Erase the pencil and add in color. Pine cones on the ground tend to come in shades of brown, but if yours happens to be in a tree it might be green or something else entirely. It's up to you!


Community Q&A
-
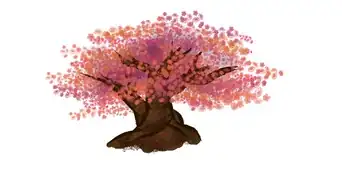
QuestionHow can I draw a pine tree?
 Community AnswerStart with a small triangle at the top. As you go down the page, make the triangles bigger. At the end, erase all the connecting lines.
 -
QuestionHow large should the pinecone be when I draw it?Community AnswerAs big as you want it to be. You are the artist, so you choose the size.
-
QuestionHow do I make it look like that?
 Community AnswerJust follow the instructions. However, it's your drawing, so add some flair and make it original. All pine cones are different, and yours should be unique.
 -
QuestionHow do you make the scales flick out?Community AnswerTry to make the scales look pointier. Don't restrict yourself to the limits of the oval you drew; instead, try to get the scales a bit outside.
-
QuestionIs there an easy way to fill it in with ink?
 T. ChinsenTop AnswererMake a rubber stamp in the desired shape using a pink eraser. For a very small shape, the eraser on the end of a pencil will also work. With the rubber stamp, use a stamp pad to make it easy to fill in the drawing.