X
This article was co-authored by Caitlin Downey. Caitlin Downey is a Registered Yoga Teacher at Yoga Therapy in Burlington, Vermont. She has over 200 hours of experience as a certified Yoga Instructor since 2014, and has over 600 hours of training as a certified Phoenix Rising Yoga Therapist.
This article has been viewed 12,804 times.
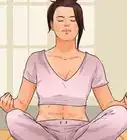
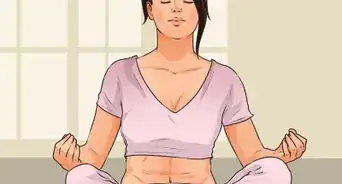
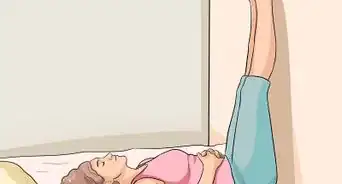
The Revolved Half Moon, or Parivrtta Ardha Chandrasana, is a pose that strengthens your abdomen, thighs, ankles, and spine. It also improves balance. One way to get into the half-moon pose is to start off in extended triangle pose and shift from there. Be careful to keep your balance. You do not want to fall and hurt yourself in triangle pose.
Steps
Part 1
Part 1 of 3:Performing the Extended Triangle Pose
Part 1
-
1Get in the starting position. You can start this yoga position in the basic triangle pose. To do the triangle pose, start off by stretching your legs 3 and a half to 4 feet apart.[1]
- Raise your arms. Hold them parallel to the floor. Reach with your arms to either side, allowing your shoulder blades and back to stretch.
- Keep your shoulder blades wide, down, and flat to your back and your palms facing the floor as you continue to reach out with your fingertips.
-
2Shift your feet and legs. Turn your right foot outward at a 90-degree angle. At the same time, turn your left toes in slightly to the right. Align your left and right heel.[2]
- As you do this, engage your quads to lift your kneecaps and tighten your thighs.
- Roll your left hip back and turn your right thigh outward. You want the center of your kneecap to line up with your right ankle. Keep your thighs tight throughout this process.
Advertisement -
3Extend your body to the right and then to the left. Start with the torso. Reach your right hand out as far as it can go to move your torso directly over your right leg. Engage your core to keep your body stable and balanced.[3]
- You want to make sure you stay standing strong. You can anchor your movement by strengthening your left leg and pressing your heel into the floor.
- Now, open your torso to the left. Move your left hip forward slightly so both hips are square and in the same plane. Move your tailbone toward your back heel.
-
4Rest your right hand on your shin, ankle, or the floor. Rest your hand on whichever place is most comfortable. This will depend on your level of flexibility.[4]
- At the same time, move your left arm towards the ceiling. Keep it in line with your shoulders.
- Turn your head to the left. Look at your left thumb.
-
5Hold the pose for 30 seconds to a minute. Hold the pose for shorter if you start to feel strained. Do not hold it for longer than a minute. Inhale as you begin your transition to half-moon pose.[5]Advertisement

Part 2
Part 2 of 3:Transitioning to Revolved Half-Moon Pose
Part 2
-
1Shift the position of your feet and head. Once you are in the extended triangle pose, you can begin the transition to revolved half-moon pose. Start small with a few tiny shifts. Place your left hand on your left hip. Look at the floor as you do so.
- Bend your right knee. Move your left foot about 6 to 12 inches closer to your right foot.
- Reach down to the floor with your left hand. Place only your fingertips on the floor, just in front of your right foot.
-
2Lift your left leg. Use your right hand and foot for support. As you lift up your left leg, straighten your right leg. Keep moving until your left leg is at least parallel to the floor. If you feel comfortable, continue to move your left leg from here, until it is higher than your hips.
- As you lift your leg, reach outward with your left heel.
- Make sure to keep your right leg and knee cap pointing towards your head.
-
3Point your right hand upward. You want to point your fingertips towards the sky. As you do so, open your torso slightly to the right. If you're able to do so while maintaining your balance, look at your right thumb.
-
4Hold the pose for up to a minute. Do not hold the pose longer than is comfortable for you. You may only be able to hold it for 30 seconds. If you feel any strain or dizziness, you should come down from the pose.
- To exit the pose, exhale as you lower your left leg.
- Transition back into extended triangle pose. Make sure to exhale as you lift your torso when transitioning back into extended triangle.
Advertisement


Part 3
Part 3 of 3:Taking Precautions
Part 3
-
1Avoid half-moon pose if you have recent or chronic injuries. This is especially important for injuries to the legs, hips, shoulders, or back. You should see a doctor to address injuries. Do not try to treat them through yoga.[6]
-
2Keep your right knee sturdy. If you knee starts to wobble, you'll lose your balance. Be aware of your right knee as you move through the pose. Strive to keep it sturdy the entire time. Do not let it bend inward. This will help you better maintain your balance.[7]
-
3Move from your belly to maintain balance. You should not bend from your hips. This will cause you to wobble and lose balance. Instead, always bend from your belly or torso. This will give you better control over your movements.[8]
- Maintain your stability and balance by keeping your core engaged. This is especially important during transitions.
Advertisement


References
- ↑ http://www.yogajournal.com/pose/extended-triangle-pose/
- ↑ http://www.yogajournal.com/pose/extended-triangle-pose/
- ↑ http://www.yogajournal.com/pose/extended-triangle-pose/
- ↑ http://www.yogajournal.com/pose/extended-triangle-pose/
- ↑ http://www.yogajournal.com/pose/extended-triangle-pose/
- ↑ http://www.yogabasics.com/asana/half-moon/
- ↑ https://yogainternational.com/article/view/alignment-tips-for-a-wobble-free-half-moon-pose
- ↑ https://yogainternational.com/article/view/alignment-tips-for-a-wobble-free-half-moon-pose
- Videos provided by Yoga Body Secret
About This Article

Caitlin Downey
Yoga Instructor
This article was co-authored by Caitlin Downey. Caitlin Downey is a Registered Yoga Teacher at Yoga Therapy in Burlington, Vermont. She has over 200 hours of experience as a certified Yoga Instructor since 2014, and has over 600 hours of training as a certified Phoenix Rising Yoga Therapist. This article has been viewed 12,804 times.
Co-authors: 11
Updated: May 25, 2021
Views: 12,804
Categories: Yoga
Advertisement