X
wikiHow is a “wiki,” similar to Wikipedia, which means that many of our articles are co-written by multiple authors. To create this article, volunteer authors worked to edit and improve it over time.
This article has been viewed 5,094 times.
Learn more...
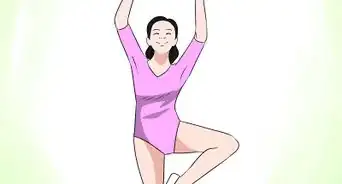
This article will teach you how to do the rond de jambe exercise in ballet. It is split into multiple parts so you can first learn the step circling your leg in a forward rotation, and then reverse it so it circles in a backwards rotation.
Steps
Part 1
Part 1 of 4:Preparing
Part 1
-
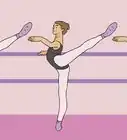
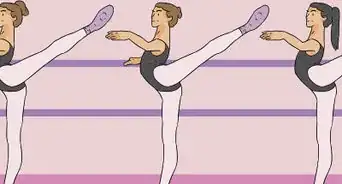
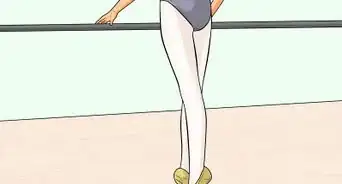
1Find a solid surface to hold onto for balance. Anything as simple as a wall will do, as long as your hand is placed on the surface in such a way where your hand anywhere from a couple inches to a foot below your shoulder, and you are not completely leaning on the surface.
-
2Know what a turnout is. This article uses the term "turnout", which newer dancers may not be super familiar with. In dance, a turnout is defined as " the outward (sometimes called lateral, or external) rotation of the hip joint".[1] . This is what causes the knee and toes to also be facing outward.Advertisement
-
3Decide which leg you want to execute the step with. If you want your right leg to be circling as your left leg supports, then hold on to your chosen surface with your left hand only, and face the wall that is perpendicular to your surface. If you want your left leg to be circling as your right leg supports, hold on to your surface with your right hand only, and face the wall that is perpendicular to your surface.Advertisement
Part 2
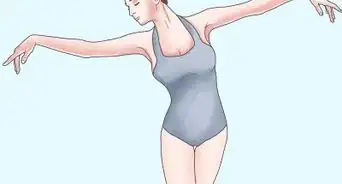
Part 2 of 4:Preparing Your Arms
Part 2
-
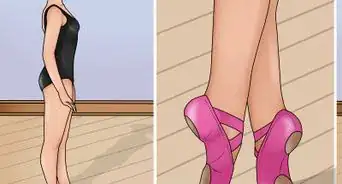
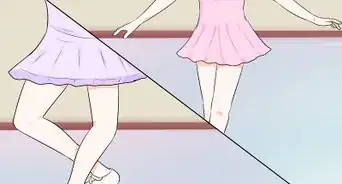
1Start with your feet in First Position as you execute these steps. First Position is a position where your heels should be touching while your toes are apart. If this is executed correctly, your feet should be in a triangle shape where your heels act as one point, and your toes are the other two points.
-
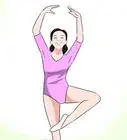
2Start with your arm in a position where your arm is lifted about an inch from the front of your body. It should be slightly bent at the elbow so it is rounded.
-
3
-
4Leave your arm in this same position (slightly bent at the elbow). Move your arm from in front of you to the side of you, while keeping it at about shoulder levelAdvertisement


Part 3
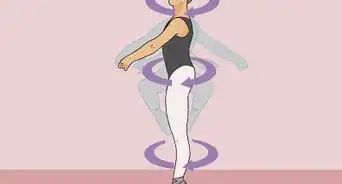
Part 3 of 4:Positioning Your Foot and Leg
Part 3
-
1Begin with your feet in First Position. This is the same position your feet should have been in while preparing your arms.
-
2Slide your chosen foot (the one not next to the wall) straight forward until your leg is completely extended
- The motion should be as if you are drawing a straight line on the floor from where your toes started (in first position), to the point where your leg is fully extended.
- As you slide your foot forward, simultaneously point your toe, and do not lose your turnout. If your turnout is correct, the tops of your toes should be facing away from the wall you are holding on to.
-
3Slide your pointed foot directly to your side. Follow the path of a circle.
- It will be tempting to lose your turnout while executing this step since this is what feels natural, but do not do this. As you move your foot in this circular path you can let your ankle rotate enough so your toes are now facing upward instead of to your side, but do not let it rotate so far that your toes are facing the wall in front of you.
-
4Slide your foot from the side of you to straight behind you. Follow the same path as when you slid it from the front to the side
- Do not end in a spot where your foot is crossed too far behind you. Your leg should be in a position where your hips will not rotate towards the outside wall.
- Much like moving from the front to the side, it may feel natural to lose your turnout completely, but that would result in improper execution. You can let your ankle rotate enough so your toes are once again facing the outside wall (with your big toe on the ground), but don't let it rotate enough so the tops of all your toes are touching the floor.
-
5Slide your foot forward so your feet are once again in First Position.
- This is the position you started in.
Advertisement


Part 4
Part 4 of 4:Reversing the Step
Part 4
-
1Slide your foot backwards from First Position. It should be pointed and in the same position as it was before you closed back to First Position after completing the circle from front to back.
- Remember, your big toe should be touching the ground while pointing, your toes should not be crunched under.
-
2
-
3Slide your foot from your side to in front of you. Still follow the circular path, and rotate your ankle so your pinky toe is closest to the ground, and the tops of your toes are facing the wall that is to your side
- Don't cross your foot too far in front of you, it should be in the same position as when you slid forward to start the forward rotation.
-
4Advertisement


References
- ↑ http://www.danceadvantage.net/turnout-part-i/
- HowcastArtsRec. “How to Do a Rond De Jambe | Ballet Dance.” YouTube, YouTube, 27 Sept. 2011, http://www.youtube.com/watch?v=z-fYrgfn61o
About This Article
Advertisement