This article was co-authored by wikiHow staff writer, Hannah Madden. Hannah Madden is a writer, editor, and artist currently living in Portland, Oregon. In 2018, she graduated from Portland State University with a B.S. in Environmental Studies. Hannah enjoys writing articles about conservation, sustainability, and eco-friendly products. When she isn’t writing, you can find Hannah working on hand embroidery projects and listening to music.
There are 7 references cited in this article, which can be found at the bottom of the page.
This article has been viewed 7,248 times.
Learn more...
If your school books are looking a little drab or boring, you might be thinking about giving them a makeover. You use your school books every day, so why shouldn’t they look fabulous? We’ve compiled some of the best ways you can DIY your school books and notebooks to keep them looking fun and fresh all year.
Steps
Method 1
Method 1 of 10:Paper bag cover
-
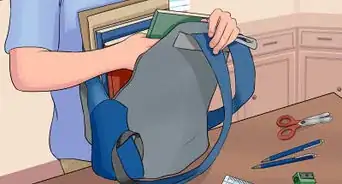
1If you can’t draw directly on the cover of your books, give yourself a blank surface. Make your own book cover out of a paper bag, then cover it with drawings, stickers, or paint.[1]
- This works well for hardcover textbooks and sturdy notebooks.
- Use this method before you start decorating if you have to return or sell your textbooks at the end of the year.

Method 2
Method 2 of 10:Chalkboard paint
-
1Write fun messages on your notebooks, then erase them! Use a paint brush to cover your notebooks in chalkboard paint. When the paint dries, it will turn into a chalkboard surface that you can use chalk on.[2]
- You can find chalkboard paint at most craft stores.
Method 3
Method 3 of 10:Washi tape
-
1Easily mix up your decoration with this patterned craft tape. Pick out a fun color or pattern, then add the tape to the border, side, or back of your school book.[3]
- You can even pick out multiple styles of tape to create patterns, like checkerboard or plaid.
Method 4
Method 4 of 10:Stickers
-
1Add your favorite characters and colors with a pack of stickers. Peel and stick your favorites onto the front, side, and back of your book for a fun pop of decoration.[4]
- If you need to peel the stickers off later, use a commercial degreaser to get rid of any leftover residue.

Method 5
Method 5 of 10:Watercolor
-
1Let your creativity shine with a fun watercolor gradient. Cover your school book with a sheet of white paper, then grab your favorite watercolors. Add a few different colors in a gradient from dark to light, then let the paint dry.[5]
- This works best for hard cover school books. Soft cover ones could get a little wet and messy.
Method 6
Method 6 of 10:Duct tape
-
1Spice up any plain notebook with patterned duct tape. Use long strips of tape to completely cover the front and back of your school book. Cut off the excess with scissors for a smooth, uniform look.[6]
- If you want a more random and fun look, try making a pattern out of different colors or shapes.
- Duct tape is tough to take off, so only do this on books you own or don’t have to sell later on.
Method 7
Method 7 of 10:Mod Podge
-
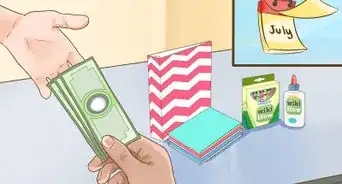
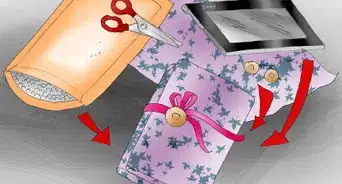
1With this craft glue, you can add any picture to the front of your book. Grab a plain white sheet of paper and arrange a few doodles or photos on it. Use a layer of Mod Podge to stick them to the paper, then cut the paper to match the dimensions of your book and glue it onto the cover.[7]
- You could use pictures from a magazine, printed quotes, or even small bits of colorful paper cut up to look like confetti.
Method 8
Method 8 of 10:Colored pencils
-
1Create your own designs easily on brown paper. Wrap your notebook in a brown paper bag, then use colored pencils to draw triangles, zig zags, squares, or circles.[8]
- You could even write your name on your book or label it with the class name.
- Sketch out your design using a normal pencil first so you can erase it if you need to.
Method 9
Method 9 of 10:Contact paper
-
1Paper with an adhesive back is the perfect decoration for your notebook. Peel off the backing and stick the paper onto the front of your book. Trim off any excess with scissors for a fun new pattern on the front cover.[9]
- You can find contact paper (or adhesive paper) at most craft stores.
- Try adding another sheet of contact paper to the back of the book, too!

Method 10
Method 10 of 10:Ribbons
-
1You can add color and texture to your book with ribbons. Grab a hot glue gun and cut around 20 pieces of ribbon to the length of your front cover. Glue the tops and bottoms of the ribbon to the cover with your glue gun.[10]
- If you want to make a cool pattern, add a second set of ribbon going from right to left across your notebook. Weave the ribbon in and out of the first set of ribbon to make a checkerboard pattern.


-Step-26-Version-2.webp)
-Step-24.webp)
References
- ↑ https://www.youtube.com/watch?t=177&v=Caexa6cxqzo&feature=youtu.be
- ↑ https://www.moritzfinedesigns.com/decorate-school-notebooks/
- ↑ https://aboutfamilycrafts.com/18-ways-to-decorate-your-notebooks/
- ↑ https://aboutfamilycrafts.com/18-ways-to-decorate-your-notebooks/
- ↑ https://www.moritzfinedesigns.com/decorate-school-notebooks/
- ↑ https://aboutfamilycrafts.com/18-ways-to-decorate-your-notebooks/
- ↑ https://www.youtube.com/watch?t=240&v=pFhBX9kR8Lc&feature=youtu.be
- ↑ https://www.youtube.com/watch?t=373&v=pFhBX9kR8Lc&feature=youtu.be
- ↑ https://www.youtube.com/watch?t=460&v=pFhBX9kR8Lc&feature=youtu.be
About This Article