This article was co-authored by wikiHow staff writer, Sophia Latorre. Sophia Latorre is a Content Manager on the wikiHow team. Before joining wikiHow, Sophia worked as a technical editor and was published in six International Energy Agency (IEA) Wind Annual Reports. Now, she writes, edits, and reviews articles for the wikiHow Content Team, working to make the content as helpful as possible for readers worldwide. Sophia holds a BA in English from Colorado State University.
There are 7 references cited in this article, which can be found at the bottom of the page.
The wikiHow Culinary Team also followed the article's instructions and verified that they work.
This article has been viewed 3,285 times.
Learn more...
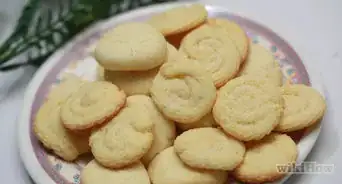
Cookies are always delicious and a layer of chocolate makes them even better! Don't be intimidated by decorating with chocolate. It looks fancy, but is actually really easy to do. We've put together a list of several fun ways to decorate cookies with chocolate.
Steps
Method 1
Method 1 of 6:Start by tempering the chocolate.
-
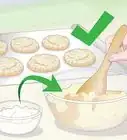
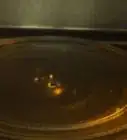
1Tempering takes longer but makes the chocolate glossy and beautiful. Chop up high-quality chocolate into bite-size pieces and add it to a medium-sized bowl. Add ½ tsp (2.1 g) of shortening per 1 oz of chocolate. Fil a larger bowl with warm water (110 °F (43 °C)) and place the medium-sized bowl inside the large bowl. Use a rubber spatula to stir the chocolate constantly until it is shiny and smooth. This takes about 20-25 minutes. If the water cools off, just replace it with warm water and keep stirring.[1]
- In a hurry? Simply melt the chocolate on the stove or in the microwave.
- Couverture chocolate is the best for decorating. It has more cocoa butter than others, which can make it easier to manipulate.[2]

Method 2
Method 2 of 6:Use colored chocolate to add pizazz.
-
1Go with chocolate melts for colorful designs. Pick up a few bags of chocolate melts in the colors of your choice from the grocery store. Melt them according to the directions on the packaging. Then you can dip or drizzle the colored chocolate over your cookies![3]
- Outline the shape of the cookies for an easy option.
- Write messages on cookies to personalize your treats.

Method 3
Method 3 of 6:Pipe chocolate designs with resealable baggies.
-
1You don’t need expensive pastry bags with this technique. Once you’ve melted the chocolate, spoon it into a baggie. Zip it closed and use kitchen scissors to snip a very small opening in one of the bottom corners. Gently squeeze the chocolate onto the cookies in the design of your choice.[4]
- Try delicate lines on snowflake cookies or pipe flowers on sugar cookies for a fun look.
- Drizzle the cookies with melted chocolate for a pretty, and easy, option.
Method 4
Method 4 of 6:Dip cookies into melted chocolate.
-
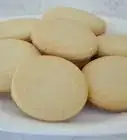
1This method lets both the cookies and the chocolate shine. It’s also really easy and great to try if you’re a beginner or have kids helping you out. Gently hold one side of the cookie while you dip the other half into the melted chocolate. Place the cookie on a sheet of wax paper to dry. They're ready to serve when the chocolate has completely cooled and hardened.[5]
- This technique is great for waffle cookies and sugar cookies. If you have Christmas tree-shaped cookies, dip just the tip of the tree into the chocolate to create a star-like effect for decoration. Or, dip half of the tree into chocolate to make a cool-looking half-choco cookie.[6]
Method 5
Method 5 of 6:Add sprinkles and candy for extra fun.
-
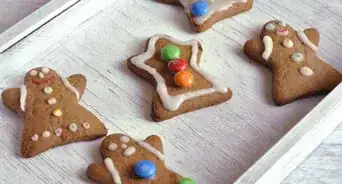
1Cover the cookies in chocolate, then add your decorations. Do this before the chocolate dries so the sprinkles stick! You can use sanding sugar, jimmies, pearls, nuts, or even candy, like M&Ms, to accent your cookies.[7]
- You can either sprinkle the decorations over top, or dip the cookies into them.
Method 6
Method 6 of 6:Create chocolate toppers.
-
1Draw chocolate designs on wax paper, then let them cool. Lay out a large piece of wax or parchment paper on top of a cookie sheet. Put the melted chocolate in a resealable baggie and snip off the bottom corner. Gently squeeze the chocolate out onto the paper. You can create abstract designs, letters, shapes, or whatever your heart desires! Move the cookie sheet to the fridge and let the chocolate harden for 10-20 minutes. Then, carefully peel the chocolate decorations off the paper and stick them on top of your cookies.[8]

References
- ↑ https://www.bhg.com/recipes/desserts/chocolate/chocolate-melt-dip-or-drizzle/
- ↑ https://leitesculinaria.com/106192/recipes-how-to-decorate-with-melted-chocolate.html
- ↑ https://tikkido.com/blog/cookies-decorated-with-chocolate
- ↑ https://food52.com/blog/9273-a-better-cookie-icing
- ↑ https://www.goodhousekeeping.com/food-recipes/dessert/g4057/decorating-christmas-cookies/?slide=6
- ↑ https://www.goodhousekeeping.com/food-recipes/dessert/g4057/decorating-christmas-cookies/?slide=12
- ↑ https://food52.com/blog/9273-a-better-cookie-icing
- ↑ https://leitesculinaria.com/106192#recipe
About This Article