This article was co-authored by wikiHow staff writer, Jessica Gibson. Jessica Gibson is a Writer and Editor who's been with wikiHow since 2014. After completing a year of art studies at the Emily Carr University in Vancouver, she graduated from Columbia College with a BA in History. Jessica also completed an MA in History from The University of Oregon in 2013.
There are 11 references cited in this article, which can be found at the bottom of the page.
The wikiHow Video Team also followed the article's instructions and verified that they work.
This article has been viewed 11,852 times.
Learn more...
Homemade boot cuffs are the perfect project if you're new to crocheting. You only need to know how to do the single crochet stitch and since you work it in the round, you don't need to mess with seaming edges together. Once you're comfortable crocheting a pair of cuffs, customize them by trying different stitches, adding scallops, or attaching buttons.
Steps
Method 1
Method 1 of 2:Making Basic Boot Cuffs
-
1Choose bulky yarn in the color you want to make the cuffs. The weight of the skein doesn't matter since you won't be using an entire skein for the cuffs. In fact, this is a great project for using up leftover yarn. Pick 1 color of yarn that's labeled "bulky" or #5.[1]
- Bulky yarn is also labeled "chunky," "craft," or "rug."
-
2Make a slip knot and slide the loop onto a size US L/11 (8 mm) crochet hook. To make an easy slip knot, pull 6 inches (15 cm) of yarn from the skein and fold it over to make a loop. Put your thumb and forefinger through the loop and pinch the yarn tail. Use your other hand to hold the working yarn while you pull the tail through the loop. Then, put it onto a size US L/11 (8 mm) crochet hook.[2]
- Pull the yarn gently to secure it to the hook.
Advertisement -
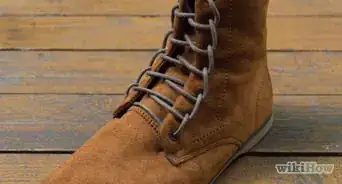
3Chain 28 stitches to make a foundation chain. To make 1 chain, wrap the working yarn around the hook and pull the hook through the loop. Keep making chains until you've formed 28 chain stitches, which is the base for the boot cuff.[3]
-
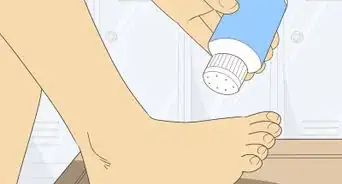
4Wrap the chain around the widest part of your calf. To tell if the chain is the right size for your calf, wrap it around the widest part of your calf. The chain should measure about 1 inch (2.5 cm) shorter than your calf so the cuff won't slide down your leg. If you need to, make the chain shorter or longer to fit your calf.
- For example, if the chain is too long, pull some of the chains out of the foundation.
-
5Join the ends and make 1 chain stitch. Once you've finished your foundation chain, push your hook into the first stitch you made. Then, wrap the yarn around it and pull it through the loop. To chain another stitch, wrap your yarn around the hook 1 more time and pull it through the loop.[4]
- If the row gets twisted, smooth it out before you join the ends or your cuff won't lie flat.
-
6Make a single crochet (SC) stitch into the first stitch. To make a single crochet stitch, insert your hook through the foundation chain stitch and wrap the yarn over. Pull the hook through the loop so there are 2 loops on your hook. Then, wrap your yarn over the hook again and pull the hook through both loops to finish the stitch.[5]
- If you're a beginner crocheter, the single crochet stitch is probably one of the first stitches you learn. This is because it's the base for a lot of crochet projects.
-
7Single crochet every stitch until the cuff measures 4 1⁄2 in (11 cm) tall. Make a SC stitch into every stitch of your round. When you get to the end of a round, keep making a SC stitch. This forms a simple fabric cuff. Keep crocheting until your boot cuff is about 4 1⁄2 inches (11 cm) tall.[6]
- Feel free to adjust the height of your cuff. Make it taller or stop crocheting earlier to make a shorter cuff.
-
8Cut an 8 in (20 cm) tail and tie off the yarn. Use scissors to cut the tail and make a simple knot at the base of the cuff fabric. This stops your cuff from unraveling.[7]
- It's important to make the tail at least 8 inches (20 cm) long so you can easily weave in the end.
-
9Weave in the yarn ends and make a matching cuff. Thread the yarn tail through the wide eye of a yarn or tapestry needle and insert the needle through the nearest stitch. Sew across the top edge of the cuff to hide the tail. Then, repeat the exact same process to make a matching boot cuff to complete the pair.[8]
- Don't forget to weave in the yarn tail at the other end of the cuff.
Advertisement

Method 2
Method 2 of 2:Customizing Your Cuffs
-
1Use more than 1 color to make multicolored cuffs. To make a striped effect, alternate colors every time you finish a round. If you'd like colorful cuffs, use multicolored yarn or just keep changing the yarn colors after every 1 inch (2.5 cm) you crochet.
- If you change the yarn, ensure that you're still using bulky weight yarn so the cuff's gauge stays the same.
-
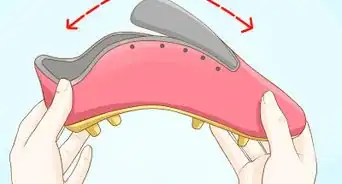
2Add a scalloped edge to the top of the cuffs for a frilly style. If you'd like to give your cuffs a unique border, double crochet into a stitch and chain 1. Repeat this 5 times into the same stitch to create 1 scallop. Then, skip 2 stitches and work another scallop. Keep doing this around 1 edge of the cuff to make a scalloped border.[9]
- Scallops are also called shells in some crochet patterns.
-
3Attach a button to give your cuffs a rustic look. Thread a yarn or tapestry needle with a 12 in (30 cm) piece of yarn. Hold the button on the side of the cuff and bring your needle from the back of the cuff through the center of the button. Stop pulling to leave 2 inches (5.1 cm) of yarn tail at the back of the cuff and push the needle down through the button. Make another loop through the button and knot the yarn in the back.[10]
- Use the same kind of yarn that you used to crochet the cuffs.
- Since these are decorative buttons, you don't need to make buttonholes.
-
4Use half-double crochet (HDC) stitches to make ribbed cuffs. For cuffs with a ribbed texture, don't single crochet every stitch of the round. Instead, make a half-double crochet stitch into each chain of the first round. Work the stitches into the back loop of each chain stitch to get the ribbed effect.[11]
- If you'd rather make cuffs with a chunkier texture, use double crochet stitches to work them.
- Half-double crochet stitches don't use as much yarn as single crochet stitches, so use HDC if you're short on yarn and want to make boot cuffs.
Advertisement
Community Q&A
-
QuestionSome boot cuff patterns have different amounts of stitches, you show 40. How do you know if it will fit in the boot without the person's leg size and boot?
 Community AnswerSingle crochets are about 3 cm when crocheted with a 5 mm hook and corresponding yarn. Double crochets are about an inch with the same scale. The best way to figure this out is to measure their calf (or something similar in size).
Things You'll Need
- 1 skein of bulky yarn
- Size US L/11 (8 mm) crochet hook
- Scissors
- Yarn needle
- 2 buttons, optional


References
- ↑ https://www.craftyarncouncil.com/standards/yarn-weight-system
- ↑ https://youtu.be/oj21JDDSrgM?t=79
- ↑ https://youtu.be/5k3QfDBy9ks?t=91
- ↑ https://youtu.be/5k3QfDBy9ks?t=126
- ↑ https://youtu.be/5k3QfDBy9ks?t=137
- ↑ https://youtu.be/5k3QfDBy9ks?t=262
- ↑ https://youtu.be/5k3QfDBy9ks?t=292
- ↑ https://youtu.be/5k3QfDBy9ks?t=319
- ↑ https://youtu.be/QVIe-iYkRqc?t=449
About This Article