X
This article was written by Nicole Levine, MFA. Nicole Levine is a Technology Writer and Editor for wikiHow. She has more than 20 years of experience creating technical documentation and leading support teams at major web hosting and software companies. Nicole also holds an MFA in Creative Writing from Portland State University and teaches composition, fiction-writing, and zine-making at various institutions.
This article has been viewed 3,172 times.
This wikiHow teaches you how to create a photo strip in Photobooth for Android and then post it to Instagram.
Steps
-
1Download Photobooth from the Play Store. This is a free app that lets you create a photo strip you can easily upload to Instagram.
- Type photobooth into the search bar, then tap the magnifying glass.
- Tap Photobooth. It’s the app with a purple camera icon. The developer is ClarkLab.
- Tap Install to start downloading the app. You may have to agree to let the app access your photos before you can continue. Once the installation is complete, the Photobooth icon will appear in the app drawer (and possibly on the home screen).
-
2Open Photobooth. It’s the purple camera icon in the app drawer.
-
3Tap Tap to add. It’s near the top of the screen.
-
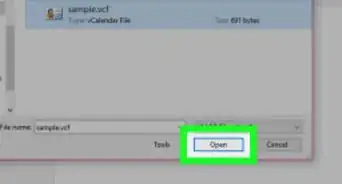
4Tap Pick Picture. This opens your phone’s photo browser app.
-
5Open the folder that contains the pictures you want to add. If you want to add photos from your Instagram folder, tap Instagram to view its contents.
-
6Tap the image you want to add. This adds the photo to the photo strip.
-
7Tap Photos to add another photo. You’ll do this 2 more times to create a 3-photo strip. Again, you’ll be able to browse to your desired folder and then tap the photo you want to add. Once you have all three photos and place, move to the next step.
-
8Tap Format to select an orientation. Here you’ll be able to choose a vertical (the default) or horizontal photo strip.
-
9Tap Size to select a size.
-
10Tap Order to rearrange the photo strip. Tap Ascending to use the order in which you added the photos, Descending to reverse that order, or Random to try something new.
-
11Tap Share Photostrip. It’s the large purple button at the bottom of the screen. This brings up a list of apps on your device.
-
12Tap Instagram. It’s the purple, pink, and yellow camera icon. This opens the photostrip in Instagram.
-
13Tap the arrows at the bottom-left corner of the screen. This zooms out the photo strip so it all fits into the frame.
-
14Tap the arrow. It’s at the top-right corner of the screen.
-
15Select a filter and tap Next. This is optional, but you can apply a regular Instagram filter to your photo (or use the editing tools) just as you would any other Instagram image.
-
16Type a caption. If you want to include text, type your caption where it says “Write a caption.” Otherwise, you can skip this step.
-
17Tap Share. It’s at the top-right corner of the screen. Now the photo strip you made in Photobooth will appear in your Instagram feed.


About This Article

Nicole Levine, MFA
Tech Specialist
This article was written by Nicole Levine, MFA. Nicole Levine is a Technology Writer and Editor for wikiHow. She has more than 20 years of experience creating technical documentation and leading support teams at major web hosting and software companies. Nicole also holds an MFA in Creative Writing from Portland State University and teaches composition, fiction-writing, and zine-making at various institutions. This article has been viewed 3,172 times.
How helpful is this?
Co-authors: 3
Updated: May 25, 2021
Views: 3,172
Categories: Software