X
wikiHow is a “wiki,” similar to Wikipedia, which means that many of our articles are co-written by multiple authors. To create this article, volunteer authors worked to edit and improve it over time.
Learn more...
Do you want to create a Google Form but want to restrict who can fill it out? Password-protect it! But how do you do that? Simply follow these steps to learn how to password-protect a Google Form.
Steps
Part 1
Part 1 of 3:Creating the Form
Part 1
-
1Create a blank Google Form. To do this, navigate to https://docs.google.com/forms on your preferred browser.
- Sign in to your Google account.
- Open a blank form.
-
2Give your form a title. This option is at the top of the screen; you'll need to click the "Untitled Form" or "Form Title" text to type in this field.Advertisement
-
3Add a form description. You can add what the form is about here, and you might like to mention that the form is password-protected, too.
- Remember to mention how people can contact you to get the password! You might want to share your e-mail address here.
Advertisement


Part 2
Part 2 of 3:Designing the Form
Part 2
-
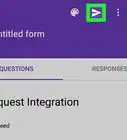
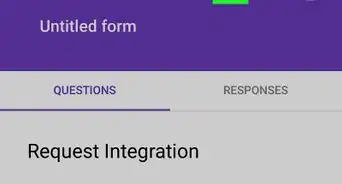
1Create a section. On the right-hand side, there will be a floating menu with options: "Add question", "Import Questions", "Add title and description", "Add image", "Add video" and "Add section". Click the last button to add a section.
- Add a section name. It could be something like "Enter password to proceed:"
- You might also like to add a section description restating how to contact you.
-
2
-
3
-
4Click the ⁝ button to the right of Required. A floating menu will appear after clicking.
-
5Choose Response validation. It will be the second option in the floating menu.
-
6
-
7
-
8Type your password where it says Pattern. Make sure the password is a strong one. Strong passwords contain both uppercase and lowercase letters, numbers, and symbols.
-
9Set up an error message. This is the note that will pop up if people enter the wrong password. You can enter something like "Wrong password", "Incorrect password", "Wrong", "Incorrect", or something similar here.
- This step is optional—"Must match pattern" will be displayed on entering the wrong password if you leave this blank.
-
10Make sure the rest of the questions are in the next section. To prevent people from viewing the rest of the questions without the password, be sure to create another section and enter all your questions there.
- This way, people won't be able to go to the next section unless they enter the correct password.
Advertisement


Part 3
Part 3 of 3:Sending the Form
Part 3
-
1Click the Preview option. This is the eye-shaped icon in the top-right screen toolbar. Make sure everything is correct, so you'll be ready to distribute your password-protected form.
-
2Double check your settings. Click the gear icon in the top right corner of the screen and review your settings. Once you've made sure they are correct, you can click Save to save them.
-
General Settings:
- Requires Sign-In - Requires respondents to sign into Google rather than being anonymous. Click the "Limit to 1 response" to enable this feature.
- Respondents can - "Edit after submit" and "See summary charts and text responses" are your options here. These let respondents change their answers and view form results after submitting.
-
Presentation Settings:
- Show progress bar - Displays a metric that tells respondents how close they are to completing the form.
- Shuffle question order - Varies the question order from user to user.
- Show link to submit another response - Creates a link to re-complete the form.
- Confirmation message - Customize your form's completion message by typing your preferred message into the field below this text.
-
Quiz Settings:
- Make a Quiz - Allows you to assign point values to questions and allow auto-grading.
- Release grade - "Immediately after each submission" and "Later, after manual review" are your options here. You can choose whether or not to immediately release grades.
- Respondent can see - This allows you to choose what responders can see after submitting the form.
-
General Settings:
-
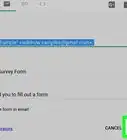
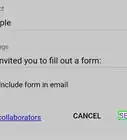
3Click the Send button to send the form. This is in the top right corner of your screen. Clicking "Send" will bring up a "Send form" menu with several different sharing options through which you can cycle from the top of the window.
- Depending on your form's purpose, your preferred option will vary:
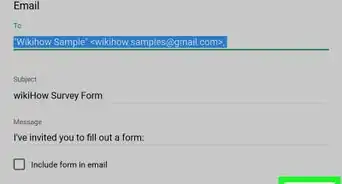
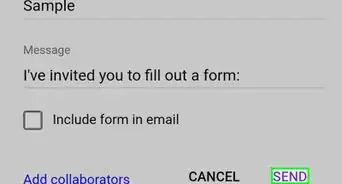
- Email - Choose this option to send an email to your contacts directly from the Forms site.
- Link - Choose this option to get a link to copy-and-paste.
- Embed HTML - Only use this option if you're placing this form directly on your website.
- Google+, Facebook, or Twitter - These are quick-share options in the top right corner of your "Send form" menu.
- Choose how you want to send the form and click Send at the bottom of the page to send it.
- Depending on your form's purpose, your preferred option will vary:
-
4Keep a frequent check on the e-mail address you provided. People may contact you to request the password. Give them the password, if you want.
- Change the password after someone submits a response. This is optional—however, you may like to do this to keep the password from leaking out.
Advertisement


Community Q&A
-
QuestionWhat if I forget the password to my form?
 ButterflyCommunity AnswerDon't worry about it—you as the owner of the form won't need to enter the password to view the form, only responders will. To view the password as the owner, open the form, find the question asking for the password, click ⁝ > Response validation. You will be able to view the password under 'pattern'.


About This Article
Advertisement