X
This article was written by Nicole Levine, MFA. Nicole Levine is a Technology Writer and Editor for wikiHow. She has more than 20 years of experience creating technical documentation and leading support teams at major web hosting and software companies. Nicole also holds an MFA in Creative Writing from Portland State University and teaches composition, fiction-writing, and zine-making at various institutions.
This article has been viewed 13,169 times.
This wikiHow teaches you how to create a clipping mask in Adobe Photoshop for Windows and macOS.
Steps
-
1Open Photoshop on your computer. It’s in the Applications folder on a Mac and the All Apps area of the Start menu in Windows.
-
2Press ⌘ Command+N (Mac) or Ctrl+N (PC). This opens the “New” dialog.Advertisement
-
3Adjust the width, height, and resolution as needed for your project.
-
4Select Transparent from the “Background Contents” drop-down menu.
-
5Click OK. The new project is now ready for editing.
-
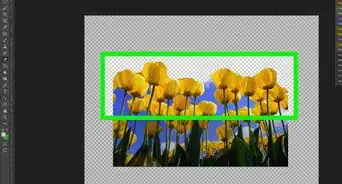
6Create the clipping layer. This is the shape where you want to add the mask. For example, let’s create a text clipping mask:
- Click the T button in the toolbar in the left panel to enter Text mode.
- Select the font size and style at the top of the app.
- Type some text onto the layer.
-
7Click the Select tool. It’s the first button at the top of the toolbar. Look for the cursor with arrows.
-
8Drag and/or adjust the placement of the text. You can move the text somewhere else on the project, rotate it, or make any other changes as needed.
-
9Click the check mark to save. It’s at the top-center part of the screen.
-
10Press ⌘ Command+O (Mac) or Ctrl+O (PC). This is to open the image that will peek out of the clipping mask.
-
11Select the image and click Open. The image will open in a new tab (but not as a layer on the original project).
-
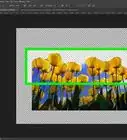
12Press ⌘ Command+A (Mac) or Ctrl+A. This selects the new image so you can add it to the project.
-
13Press ⌘ Command+C (Mac) or Ctrl+C. This copies the image.
-
14Click the new project you created. It’s a separate tab at the top of the app.
-
15Press ⌘ Command+V (Mac) or Ctrl+V. This pastes the image onto the project, creating a new layer.
-
16Adjust the size and placement of the image so it covers the text. Drag the corners and edges until the new image is where you want it to be.
-
17Click the check mark. This accepts the changes.
-
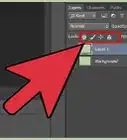
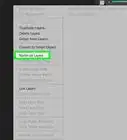
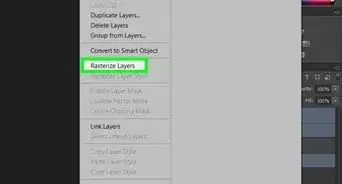
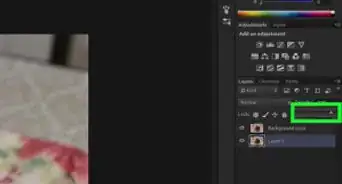
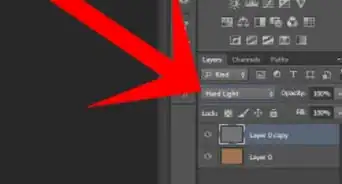
18Right-click the layer in the Layers panel. It’s in the right column. A menu will appear.
-
19Click Create clipping mask. The image will go behind the mask you created and appear in the shape of the text.
-
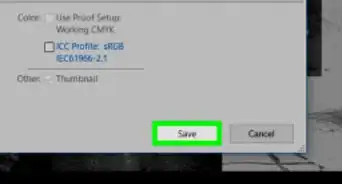
20Save your work. To save in Photoshop, click the File menu, select Save As, name the file, then click Save.Advertisement


About This Article

Nicole Levine, MFA
Tech Specialist
This article was written by Nicole Levine, MFA. Nicole Levine is a Technology Writer and Editor for wikiHow. She has more than 20 years of experience creating technical documentation and leading support teams at major web hosting and software companies. Nicole also holds an MFA in Creative Writing from Portland State University and teaches composition, fiction-writing, and zine-making at various institutions. This article has been viewed 13,169 times.
How helpful is this?
Co-authors: 4
Updated: August 18, 2021
Views: 13,169
Categories: Photoshop Layers
Advertisement