X
This article was written by Nicole Levine, MFA. Nicole Levine is a Technology Writer and Editor for wikiHow. She has more than 20 years of experience creating technical documentation and leading support teams at major web hosting and software companies. Nicole also holds an MFA in Creative Writing from Portland State University and teaches composition, fiction-writing, and zine-making at various institutions.
This article has been viewed 10,703 times.
This wikiHow teaches you how to merge two or more video files in Windows or macOS.
Steps
Method 1
Method 1 of 2:Using Avidemux for Windows
Method 1
-
1Go to http://avidemux.sourceforge.net/download.html in your web browser. This is the download page for a free video editor called Avidemux.
-
2Scroll down and click FossHub next to your version of Windows. The Avidemux installer will now download to your PC.
- You may have to click Save File to begin the download.
-
3Install Avidemux on your PC. Double-click the Avidemux installer you just downloaded, and then follow the on-screen instructions to complete the installation.
-
4Open Avidemux. You’ll find it in the All Apps section of the Start menu.
-
5Click the Open button. It’s the blue folder at the top-left corner of the app. This opens your computer’s file browser.
-
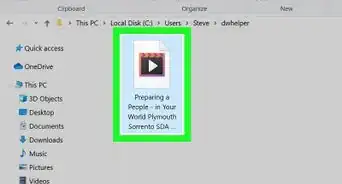
6Open the folder that contains the first video.
-
7Select the video and click Open. The video is now open in Avidemux.
-
8Click the File menu. It’s at the top-left corner of the screen (above the folder you clicked earlier).
-
9Click Append…. It’s near the top of the menu. The file browser will open again.
-
10Open the folder that contains the next video.
-
11Select the video and click Open. You’ve appended the second video to the first.
- To merge even more videos, click File and select Append… again.
-
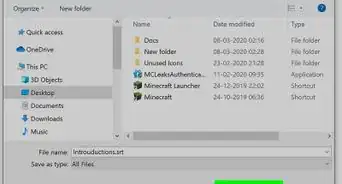
12Click the Save icon. It’s the floppy disk icon close to the top-left corner of the screen.
-
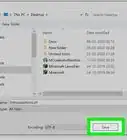
13Type a name for the video. This will become the video’s file name.
-
14Click Save. The merged videos are now saved as one file.


Method 2
Method 2 of 2:Using QuickTime Player for macOS
Method 2
-
1Open the first video in QuickTime. You can do this by double-clicking the file on your computer.
-
2Open Finder. It’s the two-toned smiling icon on the Dock. A list of files and folders will appear.
-
3Open the folder that contains the other video(s).
-
4Drag a video from Finder to the video in Quicktime. Drop the file right onto the video that’s open in Quicktime. The newly-added video is now joined to the original video (it’s the one that’s highlighted in the “play” bar at the bottom of the screen.[1]
- You can combine multiple videos by dragging additional files in the same manner.
-
5Drag the clips to rearrange them. This is optional, but you can change the order of clips in the video by dragging them left or right.
-
6Click the File menu. It’s at the top-left corner of the screen.
-
7Click Save. This saves the video to your Mac.
- To save the video as a different format, click Export instead of Save, and then choose your desired file format.[2]


References
About This Article

Nicole Levine, MFA
Tech Specialist
This article was written by Nicole Levine, MFA. Nicole Levine is a Technology Writer and Editor for wikiHow. She has more than 20 years of experience creating technical documentation and leading support teams at major web hosting and software companies. Nicole also holds an MFA in Creative Writing from Portland State University and teaches composition, fiction-writing, and zine-making at various institutions. This article has been viewed 10,703 times.
How helpful is this?
Co-authors: 1
Updated: February 3, 2021
Views: 10,703
Categories: Video | Video Conversion Software