This article was written by Darlene Antonelli, MA. Darlene Antonelli is a Technology Writer and Editor for wikiHow. Darlene has experience teaching college courses, writing technology-related articles, and working hands-on in the technology field. She earned an MA in Writing from Rowan University in 2012 and wrote her thesis on online communities and the personalities curated in such communities.
This article has been viewed 2,142 times.
If your document in Word is riddled with blue lines, you might have a few grammatical errors. This wikiHow will teach you how to check your grammar in Word on Windows and Mac computers since the feature to check grammar is not available for the mobile app yet.
Steps
Method 1
Method 1 of 3:Using Word 2016-2019 and the Website
-
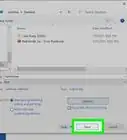
1Open your document in Word. If you're in Word, you can open your document by clicking File > Open; if you're not in Word, you can right-click the file in your file explorer and click Open with > Word.
- If you're using the web, you can go to https://office.com/launch/word and open a document from your OneDrive.
-
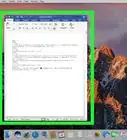
2Click Review (desktop application) or Home (web). You'll see this in the menu running across the top of your document with File and Insert.
-
3Click Check Document (Windows) or Editor (web). You'll find this in the Proofing grouping all the way on the left side of the menu if you're using a desktop application. If you're using the web, you'll find this on the far right side of the menu next to Voice.[1]
- An editor box will pop up or slide out from the side.
-
4Click the error Word found. You'll see suggestions that will fix your sentence or wording. You can either click to change the error, ignore it once, or ignore it throughout the document.


Method 2
Method 2 of 3:Using Word for macOS
-
1Open your document in Word. If you're in Word, you can open your document by clicking File > Open; if you're not in Word, you can right-click the file in your file explorer and click Open with > Word.
-
2Click Review. You'll see this in the menu running across the top of your document with File and Insert.
-
3Click Spelling & Grammar. You'll find this in the Proofing grouping all the way on the left side of the menu.
- An editor box will pop up or slide out from the side.
-
4Click the error Word found. You'll see suggestions that will fix your sentence or wording. You can either click to change the error, ignore it once, or ignore it throughout the document.[2]


Method 3
Method 3 of 3:Using Word 2013
-
1Open your document in Word. If you're in Word, you can open your document by clicking File > Open; if you're not in Word, you can right-click the file in your file explorer and click Open with > Word.
-
2Click Review. You'll see this in the menu running across the top of your document with File and Insert.
-
3Click Spelling & Grammar. You'll find significantly less functionality with the spelling and grammar checker in Word 2013 than in 2016-2019, but any word or phrase underlined in blue will come with a suggestion to fix it.


References
About This Article

1. Open your document in Word.
2. Click Review.
3. Click Check Document (Windows) or Spelling & Grammar (Mac).
4. Click the error Word found.