X
wikiHow is a “wiki,” similar to Wikipedia, which means that many of our articles are co-written by multiple authors. To create this article, volunteer authors worked to edit and improve it over time.
This article has been viewed 75,333 times.
Learn more...
Here's a quick guide to changing the Taillight bulb on a 2006-2013 Nissan Versa Hatchback. You'll need a few handy tools and a bit of patience!
Steps
-
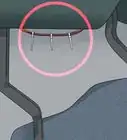
1Open the rear hatchback door. Look directly behind the Taillight assembly for two plastic interior snap covers that have a small slit opening in them.
-
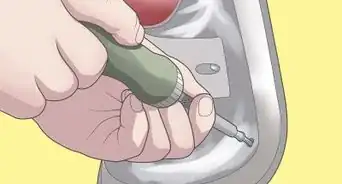
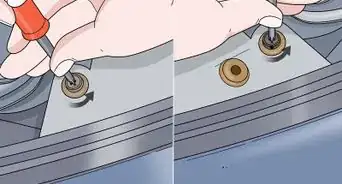
2Insert the flat head screwdriver into both covers. Gently pop each of them off. Behind each cover, you will see a small 10MM or 8MM nut attached to the taillight assembly stud.[1]Advertisement
-
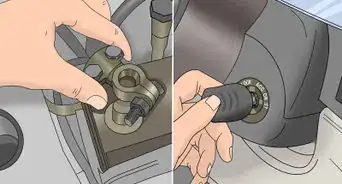
3Remove the lower nut first. You can use a 10MM or 8MM socket, small extension drive and a ratchet.[2]
-
4Remove the upper nut next. You can use the open end wrench or a flex socket adapter.[3]
-
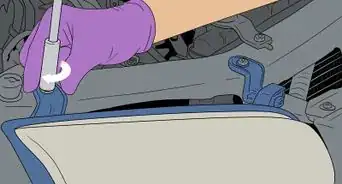
5Get ready to remove the Taillight housing. Once both nuts are removed, proceed to the outside of the taillight assembly and gently insert a flat head screwdriver between the taillight and vehicles body, starting at the bottom of the Taillight. Slowly pry very slightly under the Taillight until it starts to move away from the body. Start at the bottom then the middle of the Taillight.[4]
-
6Fully remove the Taillight. Once the Taillight has slightly moved away from the body grab the Taillight and gently pull it away from the vehicle. If it doesn't move, gently pry very slightly a few more times until it does.
-
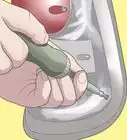
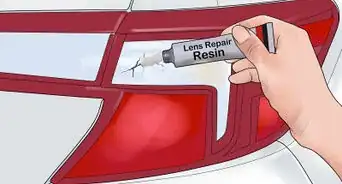
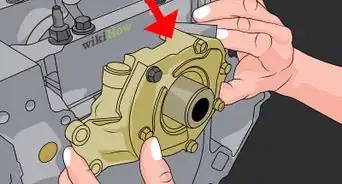
7Change the bulb. With the Taillight in your hand, locate the Taillight bulb socket and turn it counter clock wise until it releases from the Taillight. With the socket in your hand, carefully grab the bulb and pull it out of the socket and insert a new one.[5]
-
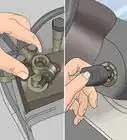
8Return the socket to the light assembly. With the new bulb installed, gently insert the socket into the Taillight assembly. Turn the socket clock wise until it clicks into the Taillight assembly and does not spin anymore.
-
9Return the Taillight to the car. Carefully align the studs of the Taillight with the holes in the body of the vehicle and push the Taillight assembly back into the car, making sure it sits flush with the body of the vehicle.
-
10Replace the nuts. Once the Taillight is installed into the body of the vehicle, replace both 10-8mm nuts on the Taillight studs and snap back into place both interior covers.[6]
-
11Check that the bulb now operates as need be. If so, you have successfully changed a Taillight bulb in a Nissan Versa Hatchback.Advertisement


Community Q&A
-
QuestionHow can I remove trunk panels from a 2009 Nissan Versa?
 Jorge camacho jrCommunity AnswerYou will need to see where the screws are, remove them, and then take the panel off carefully.
 -
QuestionWhat tools do I need?Jorge camacho jrCommunity AnswerA voltage meter and some minor tools: both a Philips and regular screwdriver, normal pliers, a basic set of sockets, and wrenches.
Warnings
- Be careful when handling light bulbs. Do not squeeze or force a light bulb from a socket, as injury may occur due to broken glass.Thanks!
- Do not pry hard between the Taillight and vehicle body, as damage to the Taillight could occur.Thanks!
Advertisement
Things You'll Need
- A flat head screwdriver
- 10mm and 8mm socket
- Short extension drive
- Ratchet drive
- Open-closed 8 and 10mm wrench


-Step-5-Version-2.webp)
References
About This Article
Advertisement