This article was co-authored by wikiHow staff writer, Janice Tieperman. Janice is a professional and creative writer who has worked at wikiHow since 2019. With both a B.A. and M.A. in English from East Stroudsburg University, she has a passion for writing a wide variety of content for anyone and everyone. In her free time, you can find her working on a new crochet pattern, listening to true crime podcasts, or tackling a new creative writing project.
This article has been viewed 16,832 times.
Learn more...
You’re enjoying a pleasant road trip with your little one when a distinct smell suddenly hits you. There’s no need to worry—car diaper changes are a lot more common than you may think. Within a few minutes, you can get your child freshened up and ready to go.
Steps
Part 1
Part 1 of 2:Getting Ready
-
1Park your car in a flat, safe area. Even if your child’s diaper is smelling a bit ripe, you don’t need to rush, or park along the side of the road to change it. Instead, take your time and park your car into a nearby parking lot or another safe area where you can safely park and focus on your child’s needs.
- For instance, you should never change your child’s diaper along the side of the road, even if you’re on a long stretch of highway. Try looking for a rest stop or other open area where you can safely park.
-
2Find a flat, clean space in the trunk where you can change the diaper. Your main goal is to create a temporary replacement for your diaper changing table at home. The trunk of your car is a great option, as long as there’s plenty of space and no items lying around that could be dangerous to a baby.[1] If you don’t have a lot of space back there, don’t worry—the base of a passenger seat is flat enough to get the job done.[2]
- Double-check that there’s nothing sharp or dangerous in your trunk that your child can grab onto or hurt themselves with. If there’s a lot of stuff lying around that can shift, or that your baby can grab onto, change the diaper on a passenger seat instead.
-
3Lay a waterproof pad down. Waterproof pads are a big lifesaver, especially when it comes to on-the-go diaper changes. Set the pad down on a flat surface, so you’ll have an easier time changing your child’s diaper.[3]
-
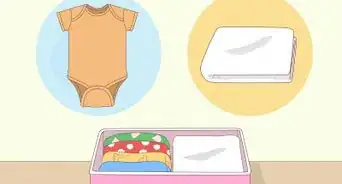
4Place your diaper-changing supplies next to the pad. Grab your clean diapers, wipes, a small trash bag, and any other supplies that you usually use when replacing your baby’s diaper. It’s best to keep extra outfits on hand in case the diaper change gets messy.[4] You may also want to pack diaper cream, disposable gloves, and anything else you typically use to change diapers.[5]
- If you go for car rides with your baby frequently, it can help to have a stash of clean diapers and wipes somewhere in your car.


Part 2
Part 2 of 2:Replacing the Diaper
-
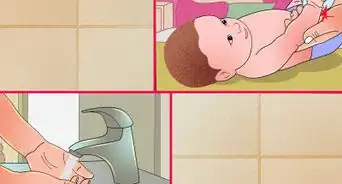
1Arrange your baby on the pad. Remove the baby from the car seat and take them to your impromptu diaper changing set-up. Place your baby on the center of the pad so you won’t get any stinky messes in the car trunk or on your upholstery.[6]
-
2Slide the clean diaper beneath your child’s rear. Don’t remove the dirty diaper immediately—instead, grab a clean diaper and place it beneath the existing one. This helps prevent messes from collecting on the pad.[7]
-
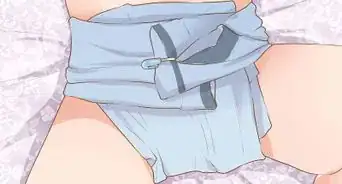
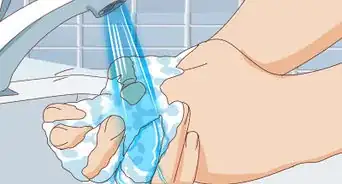
3Change the diaper as quickly as you can. Remove the old diaper and wipe off any messes with a fresh diaper wipe. Place the used items in a plastic bag, so you can toss them out easily in a trash bin. Secure a clean diaper onto your baby, making sure that it’s snug. If you have the supplies on hand, wipe down your baby’s hands in case they picked up any germs from their old diaper.[8]
- If needed, apply diaper cream along with the diaper.
- If there’s a trash can nearby, discard the old diaper and wipes there. If not, you can toss them out when you get home.
-
4Clean up and put your supplies away. Sanitize or wipe off your hands and secure your baby back into their car seat. Grab a disinfectant wipe and clean off the surface of the pad so it’s ready to use next time. At this point, store your diaper changing supplies in their usual place in your car. You’re now ready to hit the road![9]
- Add the disinfectant wipe to your mini trash bag if you haven’t thrown it out already.
- Double-check the disinfectant label to ensure that it’s safe to use on your waterproof pad.


Warnings
- If it’s raining outside, avoid carrying your baby around the back to the trunk.[13]Thanks!
Things You’ll Need
- Diapers
- Diaper wipes
- Waterproof pad
- Plastic bag
- Disinfectant wipes or spray


References
- ↑ https://www.llli.org/breastfeeding-info/travel/
- ↑ https://www.babycenter.com/2_how-to-change-a-diaper-in-the-car_10415517.bc
- ↑ https://www.llli.org/breastfeeding-info/travel/
- ↑ https://www.llli.org/breastfeeding-info/travel/
- ↑ https://www.cdc.gov/healthywater/hygiene/diapering/childcare.html
- ↑ https://www.babycenter.com/2_how-to-change-a-diaper-in-the-car_10415517.bc
- ↑ https://www.babycenter.com/2_how-to-change-a-diaper-in-the-car_10415517.bc
- ↑ https://www.cdc.gov/healthywater/hygiene/diapering/childcare.html
- ↑ https://www.cdc.gov/healthywater/hygiene/diapering/childcare.html