X
wikiHow is a “wiki,” similar to Wikipedia, which means that many of our articles are co-written by multiple authors. To create this article, volunteer authors worked to edit and improve it over time.
This article has been viewed 11,296 times.
Learn more...
The ability to transmit electricity wirelessly has been around for a long time. In recent years, wireless charging of consumer electronic devices has become common. The simplest wireless circuit consists of only a handful of parts. At the very least, it consists of a power source, a transistor, an antenna coil, a receiver coil, and of course something to power on the receiver end also known as a load.
Steps
-
1Collect materials. You will need:
- Copper wire
- 2n2222 or pn2222 transistor
- Battery holder
- Battery
- Switch
- LED
- 2-inch diameter PVC
- Electrical tape or shrink tube
-
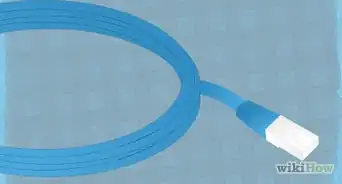
2Wrap the receiver coil. Wrap copper wire around PVC 15 times tightly to create a coil, leaving ~1-inch extra on either side. Wrap tape around the coil to ensure it doesn't come apart.
-
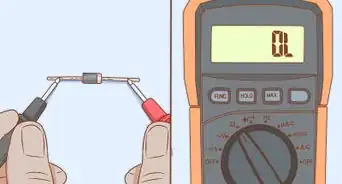
3Strip ~1/2 inch of the cable jacket off of the conductors at each end. This must be done at every connection.
-
4Attach the LED to the receiver coil. Wrap the one of 1-inch leads we left on the receiver in the previous step around either of the LED leads. Repeat for the remaining leads. Wrap tape around each connection to secure in place.
- You will notice that the leads of the LED are different lengths: one is the positive anode, the other is the negative cathode. The longer of the two is the anode. In this application it won't matter, but good to know either way.
-
5Wrap the transmitter coil. Using the same PVC, wrap the wire 7 times. After the seventh turn create a small loop ~1-1/2 inch across before continuing, and finish with another 7 turns, leaving ~1-inch extra on either side. Wrap tape around the coil to ensure it doesn't come apart.
-
6Cut the center of the loop you made in the previous step. Again strip the ends of all cables, ~1/2 inch. Wrap tape around the coil to ensure it doesn't come apart.
-
7Twist together the conductors of the cut loop. This will create a single lead that will be easier to attach later.
-
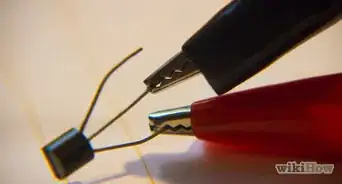
8Bend the outer pins gently away from the middle pin. This will make the connections easier to manage.
-
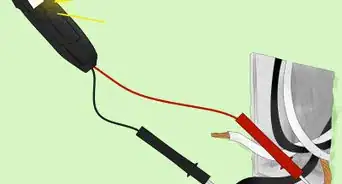
9Attach the transistor to the transmitter coil. Wrap 1 lead from the transmitter coil around lead 2 of transistor, and the other coil lead around lead 3 of the transistor, using tape to secure connections.
-
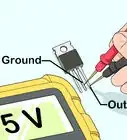
10Attach the battery holder to the transistor. Connect the negative terminal of the battery holder to the emitter of the transistor. The negative terminal will be marked with a "-" and if there is a cable it will be colored black.
-
11Attach the switch to the battery holder. Connect a terminal of the switch to the positive terminal of the battery holder. The positive terminal will be marked with a "+" and if there is a cable it will be colored red.
-
12Attach the switch to the transmitter coil. Connect the other terminal of the switch to the single loop made in the transmitter coil.
-
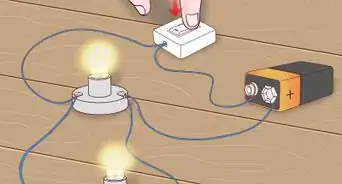
13Test circuit operation. Insert the battery into the battery holder. Turn the switch to on position and move receiver coil assembly within range of the transmitter.


Warnings
- Always use caution when working with electricity.Thanks!
- Never work on a live circuit.Thanks!
- Never touch any exposed metal while the circuit power is on.Thanks!
Things You'll Need
- Copper wire
- 2n2222 or pn2222 transistor
- Battery holder
- Battery
- Switch
- LED
- 2-inch diameter PVC
- Electrical tape or shrink tube