wikiHow is a “wiki,” similar to Wikipedia, which means that many of our articles are co-written by multiple authors. To create this article, 9 people, some anonymous, worked to edit and improve it over time.
wikiHow marks an article as reader-approved once it receives enough positive feedback. This article received 16 testimonials and 91% of readers who voted found it helpful, earning it our reader-approved status.
This article has been viewed 383,952 times.
Learn more...
One of the most useful tools for cutting firewood is a good "X" shaped sawbuck.
A sawbuck is a special kind of sawhorse framed for holding rough wood so you can saw it into lengths suitable for use in a stove or fireplace.
The sawbuck basically consists of two "X" forms -- one at each end -- which may be stabilized by a third (central) "X". The long firewood to be cut is placed in the top ("V") part of the "X" pieces where it may then be sawed.
Steps
-
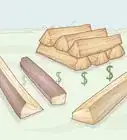
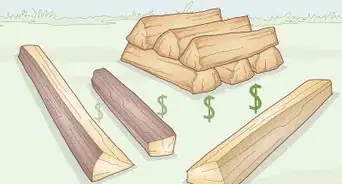
1Select the size. Design the permanent sawbuck to be 6 vertical 2x4's (38 mm x 89 mm) or 2x6s (38 mm x 140mm) of about 4 feet (1.22 meters) long and 4 horizontal 2x6's 5 feet (1.52 meters) long using 3.5 inch (8.89 cm) wood screws or nails.[1] (See "Tips" for information on making a demo/prototype version instead.)
- Cutting the top "V" form portion at an angle and with a shorter top would make it lighter and more open. Adding a trough or floor, as a retainer like feature, into the top "V" allows for a lower chance of shorter pieces of firewood unexpectedly falling from the inner part of the sawbuck to the ground.
-
2Place the middle of the "X" a little higher for use with a chainsaw; rather than lower for a bow saw(if you prefer).Advertisement
-
3Design your sawbuck/sawhorse by considering various methods shown in the illustrations. Tailor the design as you desire or require.
-
4Use suitable boards for your project. Nominal 2X6s or 2X4s of pine (southern yellow or lodgepole or white), or spruce will be fine.
-
5Consider starting with one (the first) "X" temporarily attached together with two nails/screws to see how tall and wide that you want to make it.
- Take it apart and angle-cut and trim the angle of the "V" as shown in the photo above.[4] Angled cutting of the "V" and making the upper "arms" shorter than the "legs" will make it less top-heavy. The arms help to hold poles and limbs to be cut on the sawbuck.
-
6Use this as your pattern for the rest.
- Feature: the upper "V" part being deep allows you to nestle and cut two or more narrow poles or tree limbs (around 3 to 8 feet (91.44 cm x 44 meters) in length) for cutting with a chainsaw to chop your firewood at a faster rate.
-
7Design a lower sawbuck if you would like to use the "X" sawbuck with a hand "bow-saw". Make the sawbuck about only 20-24" (50.8 cm x 60.9 cm) high to the center. This will allow the user to put a foot on top of the poles or resulting in the split wood being cut when it is that low (as illustrated).
-
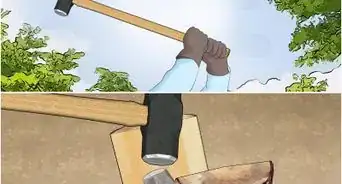
8Design a wide, heavily braced base to give you more stability while handling a chainsaw.
- Caution: A lightweight sawbuck might lead to an injury if it falls over while you are cutting. Don't use a smaller sawbuck for chainsaw work.
-
9To build a non-folding sawbuck, simply connect the "X" forms together, using 4 to 6 nails/screws driven permanently into the near-center of each "X".Advertisement
Method 1
Method 1 of 2:Folding Sawbuck
-
1Make the sawbuck fold if you like. One way to connect the sawbuck together is to use one big bolt of about a 4 inch (10.16 cm) long, and 1/2 inch (12.7 mm) in diameter.[5]
- You may find inexpensive [or free] long bolts, and nuts that fit them, on the ground in a self-service, automobile wrecking yard). Put it in the exact same placement at the center of each "X", using extra-large washers, so that it can be clamped together and loosened to fold for storage.
-
2Consider screwing on a leg spacer-brace on each "X". Then unscrew the end spacer-brace to allow the "X" to fold.
- Long, common bolts are not very expensive- they cost between $1 to $1.50 each at a lumber or hardware store. (But, tempered, hardened, fine threaded bolts cost about 4 to 5 times as much.)
Advertisement
Method 2
Method 2 of 2:Rustic Method
-
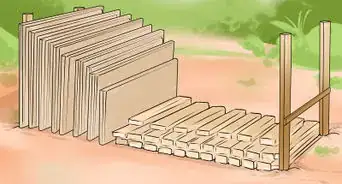
1A simple rough sawbuck or sawhorse may be built in the woods for a camp or lodge.
-
2The rustic form shown here can be made in the field from available materials, following a similar process but with wooden poles instead.
- State parks and such probably do not allow any harvesting of wood, so this - building a sawbuck- is for private land or the untamed wilderness.
Advertisement
Community Q&A
-
QuestionIf a sawbuck has 3 x's, is the distance between them the same, or is one section of the x narrower?
 Community AnswerYou would want one space smaller for those final cuts. Consider spacing based upon how long you want each length of your firewood to be.
 -
QuestionHow are the posts held together?
 Community AnswerBolts in the main frame and nails in the rest looks and works wonderfully.
Warnings
- Avoid tipping the sawbuck over due to chainsaw kickback while cutting - the base should be built heavily enough to be stable.Thanks!
- Ordinary head, hearing and eye protection should be adequate protection or as recommended by equipment manufactures when sawing lumber, poles, limbs and/or driving nails.Thanks!
Things You'll Need
- Soft rubber, tissue or cotton ear plugs,
- Simple hat or hardhat,
- Safety glasses,
- Circular saw or handsaw, tape measure, square;
-
Hammer
- Zinc-galvanized nails, 3.5 inch (approx);
-
Or: Electric drill
- Zinc-galvanized screws, 3.5 inch long;
- Lumber of the type you prefer


References
- ↑ https://survivalsherpa.wordpress.com/2013/11/06/building-a-sawbuck-work-smarter-in-the-woodpile/
- ↑ https://survivalsherpa.wordpress.com/2013/11/06/building-a-sawbuck-work-smarter-in-the-woodpile/
- ↑ http://howtospecialist.com/workshop/how-to-build-a-folding-sawbuck/
- ↑ https://www.firewood-for-life.com/sawbuck-plans.html
- ↑ https://www.firewood-for-life.com/sawbuck-plans.html