This article was co-authored by wikiHow staff writer, Jessica Gibson. Jessica Gibson is a Writer and Editor who's been with wikiHow since 2014. After completing a year of art studies at the Emily Carr University in Vancouver, she graduated from Columbia College with a BA in History. Jessica also completed an MA in History from The University of Oregon in 2013.
There are 9 references cited in this article, which can be found at the bottom of the page.
Learn more...
We've all had it happen at one point—the dreaded camera shake. When that great shot you took was ruined by a little jolt and you got a blurry image instead of a crisp photo. Although it is really irritating, there are lots of solutions! Just make a few adjustments to your shutter speed and steady yourself when you take the shot to get clear, defined photos every time.
Steps
Method 1
Method 1 of 2:Adjusting Camera Settings
-
1Use a shutter speed that's faster than your lens's focal length. If your shutter speed is too slow, it will catch movement that makes your images blurry. To get a crisp shot, set your shutter to open and close quickly so it freezes that movement.[1]
- For example, if your lens's focal length is 200mm, your shutter speed should be at least 1/200 or faster, like 1/320 or 1/400.
-
2Bump up the ISO to use a faster shutter speed. What if you want to use a faster shutter speed, but you can't go up any higher? Make your camera's light sensor more sensitive by raising the International Organization for Standardization (ISO). Since your camera's now more sensitive to light, you can use a faster shutter speed.[2]
- For example, instead of shooting with a 1/90 shutter speed and 200 ISO, double the ISO to 400, so you can photograph with a 1/180 shutter speed. You'll minimize shake and get a clearer shot.
Advertisement -
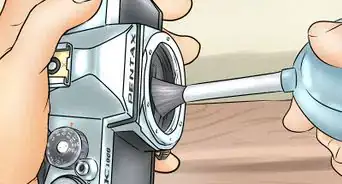
3Use your lens's stabilization features if it has them. Look on the side of your lens to see if it has a stabilizing feature and switch it on to reduce camera shake. This feature can be called different things based on the brand, so look for any of these terms:[3]
- Image stabilization (IS)
- Vibration reduction (VR)
- Shake reduction (SR)
-
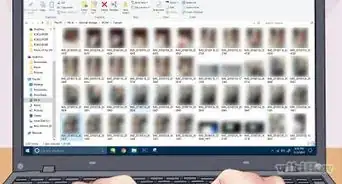
4Experiment with using your camera's burst mode. If your camera has this feature, it will shoot at least 3 photos in rapid succession. While it doesn't necessarily reduce camera shake, it does improve the chances that one of them will be sharp. Try using this setting the next time you take action shots like a sports game.[4]
- Your camera might also call this "continuous shoot mode."
-
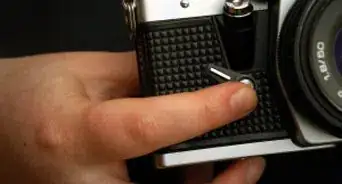
5Take the image with a remote shutter release if you have one. When you press down on the shutter button, you make the camera vibrate very slightly. Instead of using your finger to manually push the button down, plug a remote shutter release cord into your camera. Once you compose your shot, press the button on the remote release to trigger the impulse that captures the image.[5]
- Remote shutter releases are really great for shooting images with a slow shutter speed since these are more likely to blur.
-
6Avoid telephoto lenses which are more likely to shake. Telephoto lenses are long! The longer your lens is, the more movement you get so your image ends up blurry. Stick with a standard lens and just move closer to your subject instead of using the telephoto lens.[6]
- If you really want to use a telephoto lens, it's important to use the stabilization feature on it.
Advertisement


Method 2
Method 2 of 2:Improving Stability
-
1Secure your camera to a tripod so it stays still. One of the best things you can do to avoid camera shake is to use a tripod. The tripod's a stable surface, so your camera won't vibrate, shake, or move as you capture the image.[7]
- Don't have a tripod? No problem! Set your camera on a flat surface like a tabletop or stack of books.
-
2Brace yourself against something sturdy. You probably don't take your tripod with you everywhere, so steady your body to prevent your camera from moving. This might mean that you lean back against a tree, lean your side against a pillar, or rest your elbows on a table instead. You may want to sit or kneel for the most stability.[8]
- If you have a friend close by, get creative! Ask your friend to stand still and brace themselves so you can lean against them.
-
3Tuck your elbows in toward your stomach so your arms don't wobble. You're more likely to bump or jostle the camera if your arms are away from your body. To give them support, draw your elbows in toward your stomach.[9]
- If you're pointing the camera up to shoot something above you, bring your elbows in toward your chest.
-
4Move closer to your subject so you don't have to use the zoom feature. Although the zoom feature on your camera is handy, it increases the chance that your lens will shake. It also makes your image grainier. If you can, get closer to your subject so you don't have to use the zoom at all.[10]
- Photographing something on the ground like a flower or stone? Lie down on the ground so you can get your camera really close to the subject.
-
5Hold the barrel of your lens and the side of your camera to steady it. Think about how you hold your camera. Do you use one or both hands to just grip the sides? If so, your hands might move or shake a little, which gives you a blurry shot. You can prevent this by using one hand to hold the side of the camera and the other hand to grasp the bottom of the lens.[11]
- Ensure that your fingers are out of the way of the lens or you could sabotage your shot!
-
6Exhale as you take the shot. This might not seem like a big deal, but paying attention to your breathing can prevent jerky camera movements. Imagine you breathe in deeply as you're photographing your shot—your chest expands and moves your camera up and forward. To prevent this, slowly breathe out when you press down on the shutter button.[12]
- Try to keep your body relaxed as you photograph. The tenser you are, the more likely you are to shake your camera.
Advertisement


References
- ↑ https://youtu.be/s2b62BJIw5c?t=158
- ↑ https://youtu.be/s2b62BJIw5c?t=255
- ↑ https://www.cambridgeincolour.com/tutorials/camera-shake.htm
- ↑ http://imagesci.ece.cmu.edu/files/paper/preprints/BlurBurst_TOG.pdf
- ↑ https://youtu.be/yBsNgyDwhJA?t=74
- ↑ https://www.cambridgeincolour.com/tutorials/camera-shake.htm
- ↑ https://www.geofflawrence.com/camera_shake.html
- ↑ https://www.cambridgeincolour.com/tutorials/camera-shake.htm
- ↑ https://photographyicon.com/camera-shake/
About This Article